Drawing Room Refresh: Embracing Tribal Blue Sophistication

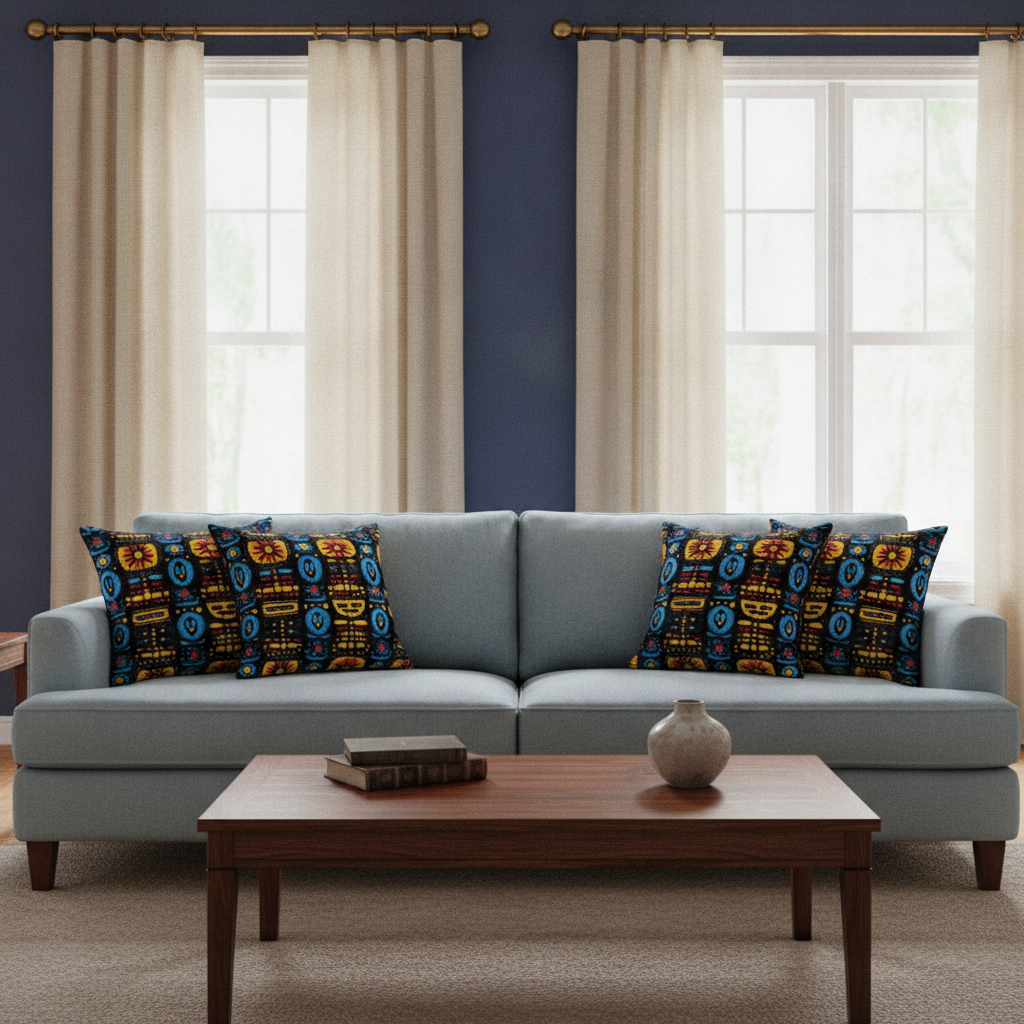
An elegant drawing room with a dark blue accent wall, a pale blue sofa, and various throw pillows displaying bold tribal patterns in yellow, pink, blue, red, and green, complemented by wooden furniture and brass hardware.

Cultivating a Distinctive Drawing Room with Tribal Blue

Creating a drawing room that reflects both comfort and curated style is a key endeavor. For an evergreen aesthetic that brings depth and character, consider blending tribal patterns with a sophisticated blue palette. This combination offers visual interest without overwhelming the space, providing a foundation for a room that feels both collected and modern. With a rich array of patterns and versatile blue tones, a tribal-inspired drawing room provides a unique canvas for expression.

Establishing Your Blue Foundation
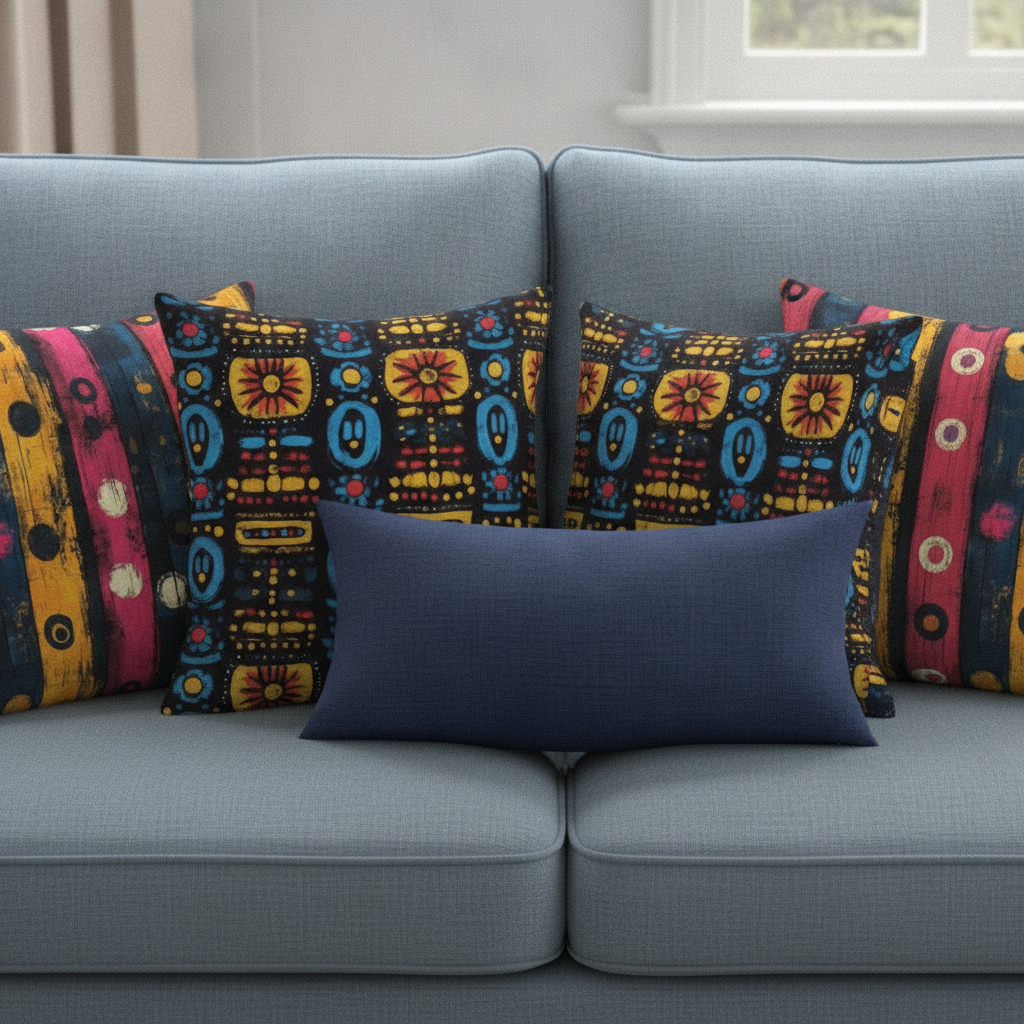
A detailed shot of mixed tribal pattern cushions on a light blue sofa, featuring designs with bold brushstrokes, abstract shapes, colorful squares, and prominent circles in yellow, blue, red, pink, and green hues.

Start with your dominant blue. A deep, saturated blue like Farrow & Ball’s “Hague Blue” No. 30 on an accent wall or within architectural details can create immediate depth. For walls, a softer, more expansive blue like Sherwin-Williams “Sky High” SW 6504 provides a calm backdrop, allowing your tribal fabrics to truly pop. Pair these with a crisp, yet warm, off-white trim like Benjamin Moore “White Dove” OC-17 for definition and brightness. This balance ensures the room feels grounded yet inviting, ready for the introduction of vibrant tribal patterns.

Introducing Tribal Patterns Through Textiles
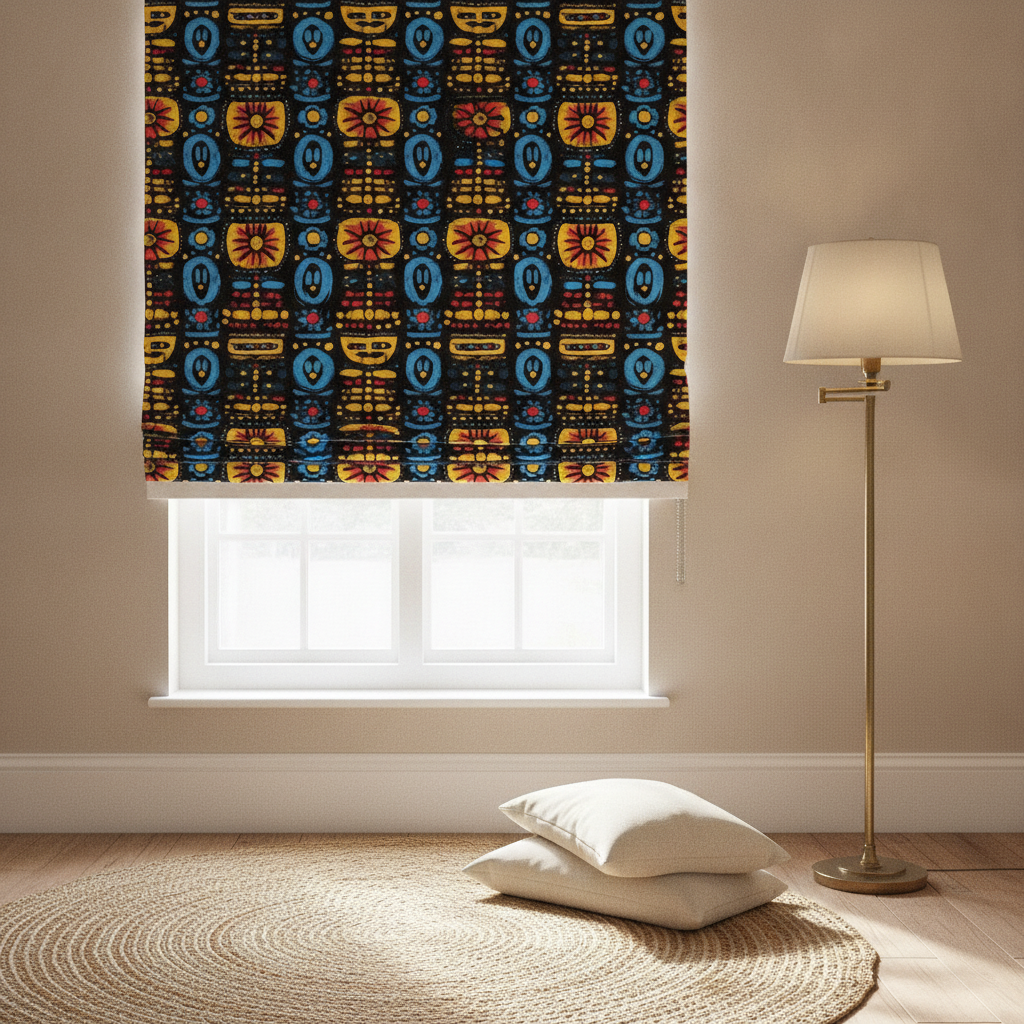
A drawing room window dressed with a striking tribal brushstroke pattern Roman blind, surrounded by crisp white trim, next to an antique brass floor lamp, with a textured jute rug visible on the floor.

Textiles are the most impactful way to integrate tribal aesthetics. Cushions, curtains, and even upholstered furniture pieces can transform the room. Our Dashiki Fusion collection offers designs that blend traditional motifs with contemporary flair.

Dynamic Cushions and Throws

  • For a focal point on your sofa, consider a pair of 50cm x 50cm square cushions crafted from our Dashiki Fusion Bold Brushstrokes Yellow Blue and Pink fabric. Its bold brushstrokes in yellow, blue, and pink, combined with geometric shapes, create a vibrant, Afrocentric pattern. For a secondary use, this fabric works exceptionally well as a framed textile art piece, stretched over a 60cm x 60cm canvas and hung as part of a gallery wall.
  • To add an abstract counterpoint, integrate a 30cm x 50cm lumbar cushion made from Dashiki Fusion Tribal Abstract Yellow Red and Blue on Black. The tribal shapes in yellow, red, and blue pop against a black background, delivering a bold Afrocentric pattern. A creative secondary application for this fabric is covering a drum lampshade, allowing the vibrant shapes to glow when illuminated.
  • Another striking option for cushions, perhaps a pair of 45cm x 45cm squares, is our Dashiki Fusion Bold Circles Yellow Pink and Blue on Black. The bold circles in yellow, pink, and blue, set against a textured black background, create a vibrant, Afrocentric pattern. Beyond cushions, this fabric can be used to reupholster a small, round footstool, providing an unexpected burst of pattern.
  • For a touch of diverse color, introduce throw pillows using Dashiki Fusion Colorful Squares Green Orange Blue and Pink. Its vibrant squares in green, orange, blue, and pink provide a bold Dashiki Fusion pattern. This design also makes an excellent backing for open shelving in a built-in bookcase, adding a hidden layer of pattern.

When arranging cushions on a 2.5-meter sofa, plan for two 50cm x 50cm cushions at each end, leaving approximately 40cm between them before placing a central 30cm x 50cm lumbar cushion. This creates a balanced, inviting arrangement.

Curtains and Blinds

For windows, Roman blinds offer a tailored finish. A blind made from the Dashiki Fusion Bold Brushstrokes Yellow Blue and Pink fabric can be a powerful statement. For a standard 1.2m wide by 1.5m high window, allow the blind to finish at a drop of 1.52m, extending just past the sill. For full-length curtains on a 2.4m high window, aim for them to just skim the floor, finishing at 2.38m. A pair of curtains for a 1.8m wide window typically requires around 7 to 8 meters of fabric, depending on pattern repeat and desired fullness.

Creating a Statement Coffee Table Runner

A simple yet effective way to add pattern to a drawing room is with a coffee table runner. For a 1.5-meter long coffee table, cut a runner from the Dashiki Fusion Bold Circles Yellow Pink and Blue on Black fabric, measuring 1.8 meters long and 40cm wide. This allows for a 15cm overhang at each end, framing the table beautifully and protecting its surface. The bold circles will draw the eye and complement the other textiles in the room.

Step-by-Step: Crafting Custom Cushions

Elevate your drawing room with custom throw cushions. Here’s a simple guide to making a 50cm x 50cm cushion cover:

  1. Gather Materials: You will need 0.55 meters of your chosen Dashiki Fusion fabric (e.g., Dashiki Fusion Colorful Squares Green Orange Blue and Pink), a 50cm x 50cm cushion insert, a 45cm zipper, matching thread, and basic sewing supplies.
  2. Cut Fabric: Cut two squares of fabric, each measuring 52cm x 52cm. This includes a 1cm seam allowance on all sides.
  3. Prepare for Zipper: On one edge of both fabric squares, mark 4cm in from each corner. Place the fabric right sides together, aligning the marked edge. Stitch a 1cm seam from each corner mark inwards, leaving the middle section (around 44cm) open for the zipper.
  4. Install Zipper: Press open the seam allowance of the unstitched section. Center your zipper face down over the pressed-open seam allowance. Pin in place and stitch the zipper to the fabric using a zipper foot, ensuring the teeth are covered by the fabric edge.
  5. Finish Cushion: With right sides together, stitch the remaining three sides of the cushion cover with a 1cm seam allowance. Trim corners, turn right side out, and press. Insert your cushion pad.

Hardware and Accessories

Complement the rich blues and tribal patterns with carefully selected hardware. Opt for unlacquered brass curtain rods and finials, which will develop a beautiful patina over time, or aged bronze for a deeper, more understated warmth. Lighting fixtures in a dark, matte finish or with woven natural elements will enhance the tribal theme without competing with the fabric patterns. Introduce natural materials like a jute rug or a dark wood coffee table to ground the room and provide textural contrast.

What to Avoid

  • Overloading Patterns: While tribal patterns are key, avoid using more than three distinct, large-scale patterns in close proximity. Balance bold prints with solid colors or subtle textures to prevent visual clutter.
  • Monochromatic Blues: Sticking solely to one shade of blue throughout the room can make it feel flat. Incorporate varying tones – from light sky blues to deep indigos – and introduce accent colors like the yellows, reds, and pinks found in the Dashiki Fusion designs.
  • Unmatched Scale: Be mindful of the scale of your patterns. A large-scale tribal print on curtains might be overwhelming if paired with another large-scale pattern on an armchair directly next to it. Mix large, medium, and small patterns for visual harmony.
  • Ignoring Texture: A room composed only of smooth surfaces can feel sterile. Incorporate varied textures through woven baskets, chunky knit throws, linen curtains, or distressed wood furniture to add depth and interest.
Crafting a Calm & Classic Retreat: Designing a Traditional Blue Nursery

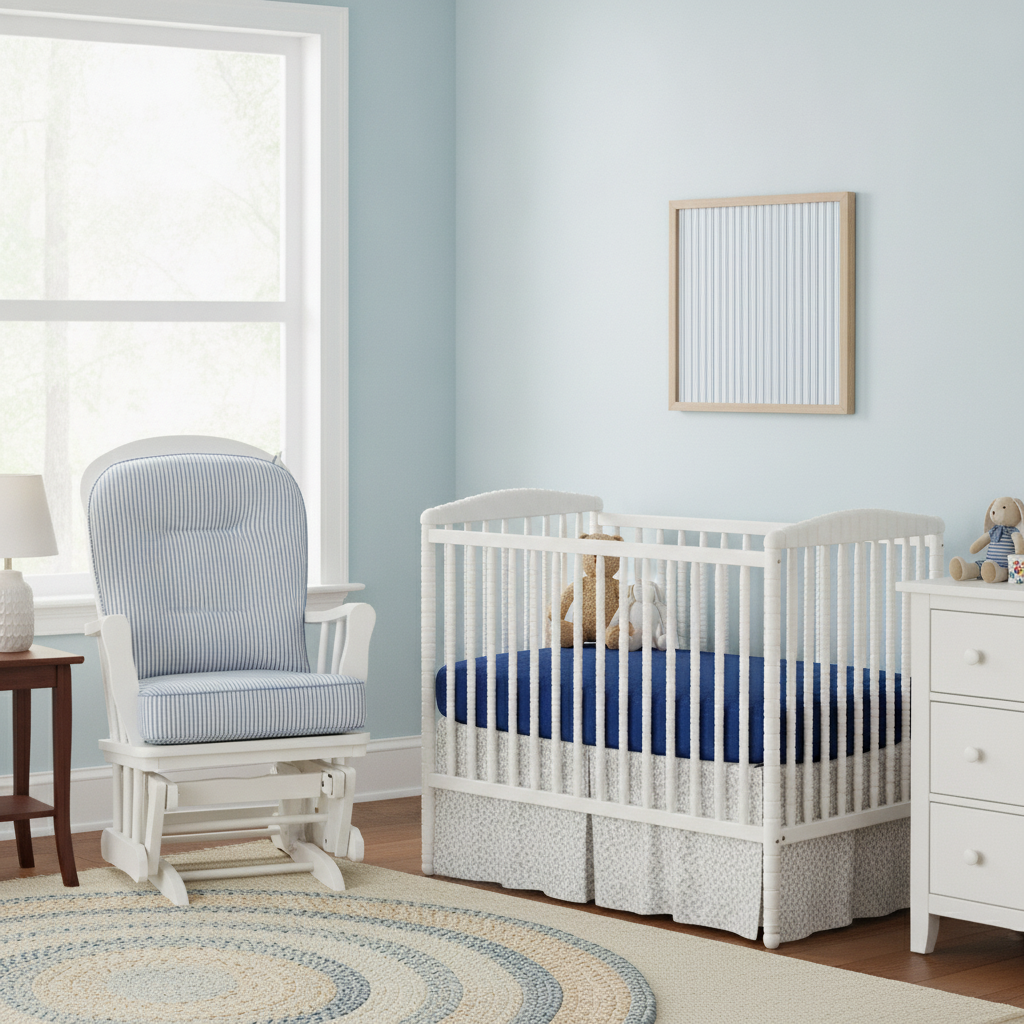
A traditional nursery featuring a white wooden crib with a dark blue fitted sheet, a light blue wall, a framed bold geometric fabric art piece above a white dresser, and a glider with a striped cushion.

Designing a Serene Traditional Blue Nursery

A traditional blue nursery offers a tranquil and enduring aesthetic, a comforting space that welcomes new arrivals with classic charm. This approach balances timeless appeal with practical considerations, ensuring a room that is both beautiful and functional. Forget fleeting trends; a well-designed traditional blue nursery provides a calm foundation that can adapt as your child grows, making it a thoughtful investment.

The Canvas: Walls, Trim, and Furniture

Start with a clean, classic backdrop. For walls, consider a soft, inviting blue that avoids being overly saccharine or too dark. Farrow & Ball’s ‘Light Blue’ offers a gentle, muted tone that shifts subtly with the light, or Benjamin Moore’s ‘Palladian Blue’ provides a slightly more saturated yet still serene option. Pair this with crisp white trim in an off-white like Farrow & Ball’s ‘Wimborne White’ or Benjamin Moore’s ‘White Dove’ for definition and brightness. For a subtle accent wall, consider a deep, grounding blue like Benjamin Moore’s ‘Hale Navy’ behind the crib to add depth without overwhelming the space.

Nursery furniture in white, natural wood, or a deep blue finish will complement the traditional style. A sturdy crib, a dresser doubling as a changing station, and a comfortable glider are essential. Choose hardware in aged brass for a warm, classic touch, or brushed nickel for a slightly more understated feel. Ensure drawer pulls and knobs are securely attached and pose no hazard.

Textile Choices: Adding Depth and Comfort

Textiles are crucial in a traditional nursery, introducing pattern, texture, and softness. Carefully selected fabrics can elevate the room, providing both visual interest and practical comfort.

Classic Stripes: Traditional Micro Sky Blue Blue Vintage Ticking Upholstery Stripes

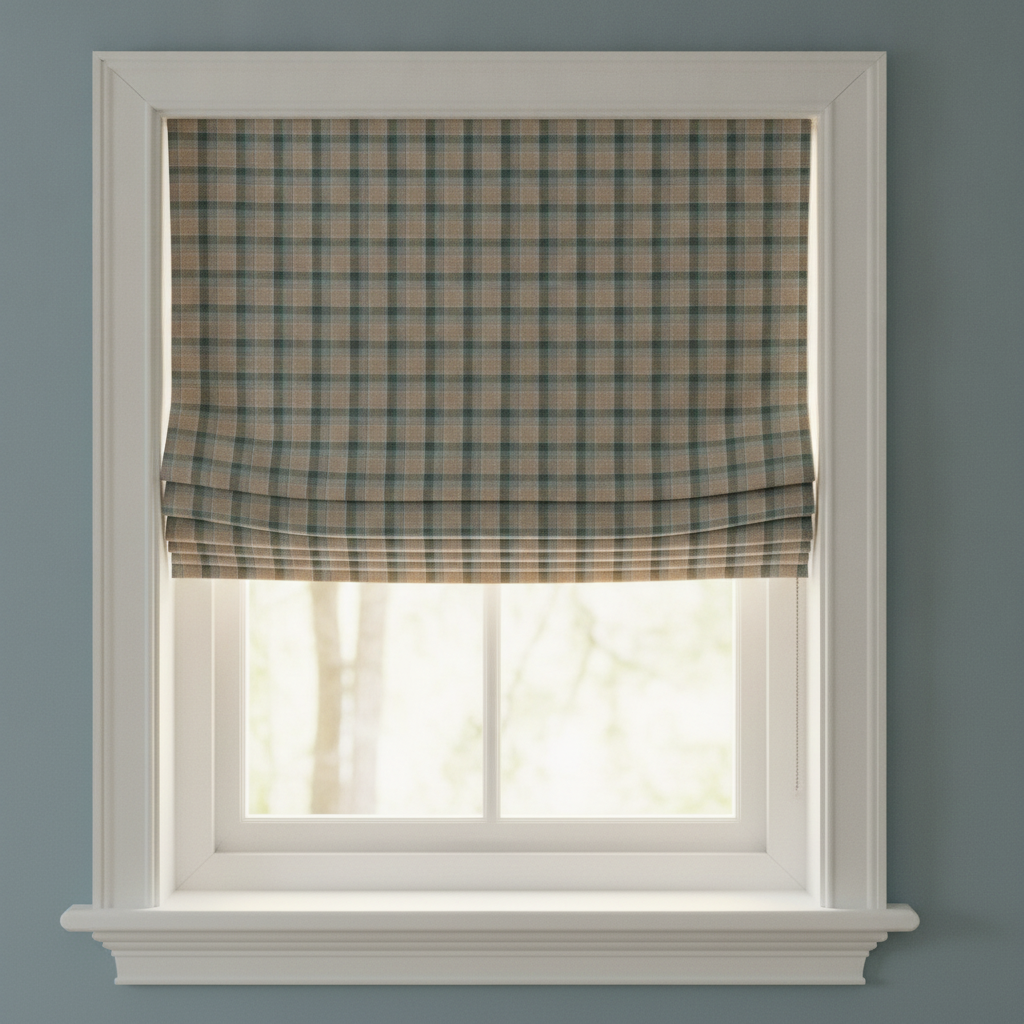
A detailed view of a nursery window with a Fraser Weathered Scottish tartan Roman blind, displaying its taupe, teal, and soft blue lines against a light blue wall with white trim.

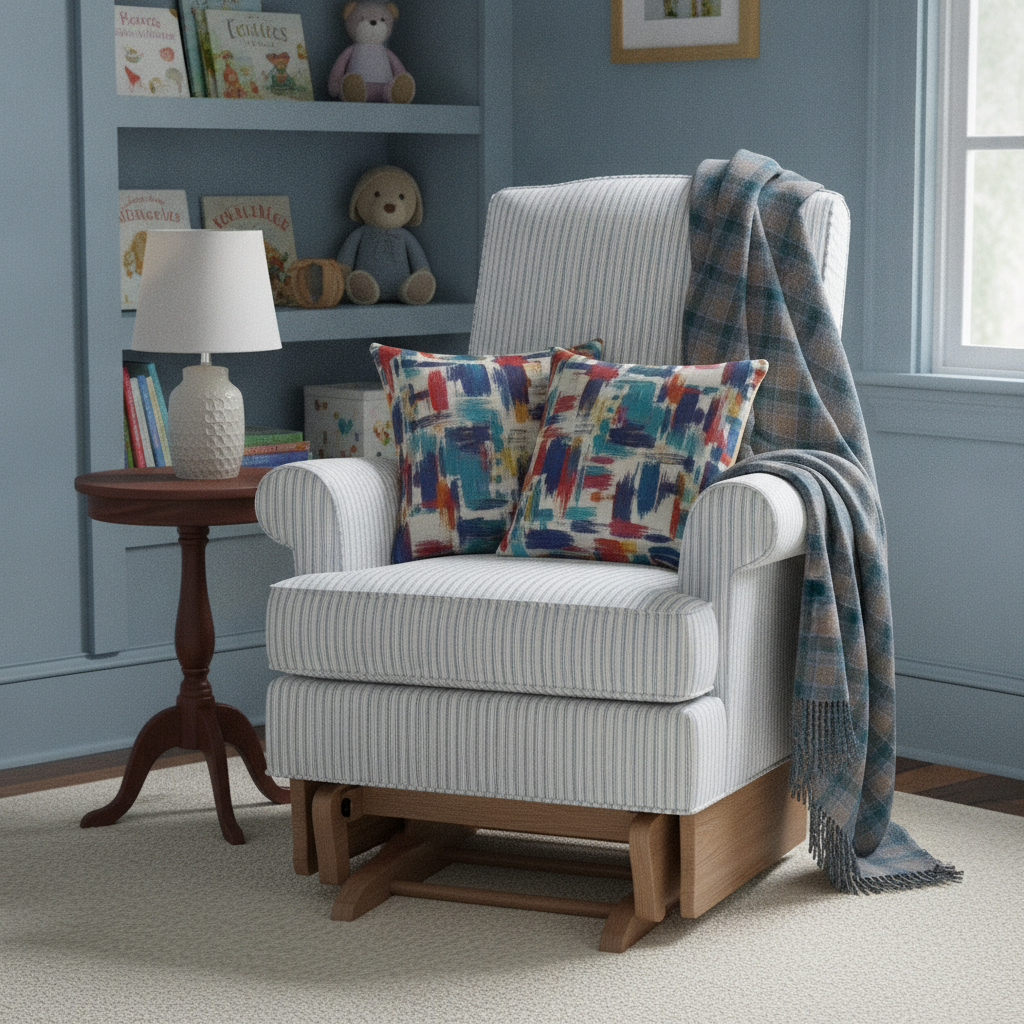
For a foundational pattern, consider the Traditional Micro Sky Blue Blue Vintage Ticking Upholstery Stripes. This fabric features a micro sky blue and white mattress narrow ticking bed stripe in a vintage style of narrow and thinner stripes alternating. Its classic Upholstery design and sky blue ticking tags make it ideal for a nursery. Use it to reupholster the seat cushion of a vintage rocking chair or glider, providing a soft, resilient surface. For a charming second use, it creates a perfectly tailored crib skirt, typically finishing about 25-30cm from the floor, adding a touch of tailored elegance beneath the crib. This subtle stripe pairs well with other patterns without competing.

Sophisticated Plaid: Fraser Weathered Wool Scottish Tartan with Taupe and Teal Accents

A nursery glider upholstered in a sky blue and white ticking stripe fabric, adorned with two vibrant Dashiki Fusion accent cushions and a Fraser Weathered Scottish tartan throw blanket.

Introduce a touch of heritage with the Fraser Weathered Wool Scottish Tartan with Taupe and Teal Accents. This fabric is a Fraser Weathered Scottish tartan with taupe and teal accents, enhanced by soft blue lines, ideal for classic upholstery or stylish fashion. Its traditional Scottish tartan and wool texture bring warmth and depth. Use it for a Roman blind on a window, ensuring the blind finishes 1cm above the sill for a neat look. For a standard 90cm wide window, you’d need approximately 1.5-2 meters of fabric depending on the drop and pattern repeat. As a second application, consider using it to craft a sophisticated throw blanket (approx. 120cm x 150cm) draped over the arm of the glider, inviting warmth on cooler days.

Bold Accents: Dashiki Fusion Bold Brushstrokes Yellow Blue and Pink

To inject a controlled burst of vibrant energy while maintaining tradition, incorporate the Dashiki Fusion Bold Brushstrokes Yellow Blue and Pink. This fabric features bold brushstrokes in yellow, blue, and pink with geometric shapes, creating a vibrant, Afrocentric pattern. While described as suitable for fabric or fashion designs, its traditional and tribal tags allow for careful integration. Use this fabric for accent cushions on the glider or a small armchair. A pair of 45x45cm cushions, placed 20cm apart, or a single 30x50cm lumbar cushion, can introduce its vibrant yellow, blue, and pink hues without overwhelming the room. As a second, unexpected use, frame a piece of this fabric to create unique wall art, allowing its bold brushstrokes and geometric shapes to stand out as a focal point.

Grounding Solids: Alaska Midnight Blue Northern Stillness

Every room benefits from a solid, grounding color, and the Alaska Midnight Blue Northern Stillness is perfect for this. This fabric is a deep midnight blue inspired by Alaska’s long nights and northern calm, with tags including arctic, cool tone, deep, and minimalist. Use this solid, intense blue for blackout curtains. For a standard 120cm wide window with a 240cm ceiling, two curtain panels, each 150cm wide and 235cm long, would provide ample fullness and block out light effectively. This would require approximately 5-6 meters of fabric. As a second functional use, craft a deeply colored, fitted crib sheet, providing a rich, dark base that contrasts beautifully with lighter bedding elements.

DIY Project: Framed Fabric Wall Art

Create a bespoke piece of art for the nursery using the vibrant Dashiki Fusion Bold Brushstrokes Yellow Blue and Pink fabric. This simple project adds a personal and artistic touch.

  1. **Gather Materials:** You will need approximately 50cm x 50cm of the Dashiki Fusion fabric, a picture frame (e.g., 40x40cm or 30x40cm, ensuring the fabric fits with some overlap), scissors, and masking tape or painter’s tape.
  2. **Prepare Fabric:** Iron your fabric to remove any wrinkles. Carefully cut the fabric to fit the frame’s backing board, leaving an extra 5cm margin on all sides.
  3. **Mount Fabric:** Place the fabric face down on a clean, flat surface. Center the frame’s backing board (the piece of cardboard or MDF that holds the picture in place) onto the fabric.
  4. **Secure Fabric:** Starting from the middle of one side, gently pull the fabric taut over the edge of the backing board and secure it with masking tape on the back. Repeat on the opposite side, then the remaining two sides, working your way around and ensuring even tension. Trim excess fabric if necessary.
  5. **Assemble Frame:** Place the fabric-covered backing board back into the frame. Secure the frame closures. Hang your new artwork approximately 15cm above the top of the dresser or crib, ensuring it’s out of reach of little hands.

What to Avoid in a Traditional Blue Nursery

  • **Overly Dark Walls in Small Rooms:** While deep blues can be striking, using them on all walls in a small nursery can make the space feel confined. Reserve intense shades for an accent wall or fabric.
  • **Cluttered Decor:** Traditional doesn’t mean overcrowded. Select a few meaningful pieces of art, a sturdy bookshelf, and practical storage baskets. Leave ample open space.
  • **Ignoring Practicality for Aesthetics:** Always prioritize safety and function. Ensure all furniture is anchored, cords are hidden, and fabrics are washable.
  • **Too Many Competing Patterns:** While mixing patterns is encouraged, ensure there’s a unifying color (like blue in this case) or scale (e.g., a fine stripe with a bold tartan) to maintain harmony. Avoid too many large-scale, busy patterns.

Crafting a traditional blue nursery is about creating a tranquil and enduring space. By carefully selecting enduring patterns, specific colors, and practical elements, you build a room that is both beautiful and functional, a comforting retreat that stands the test of time.

Cream Cottagecore Nursery: A Gentle Retreat for Little Ones

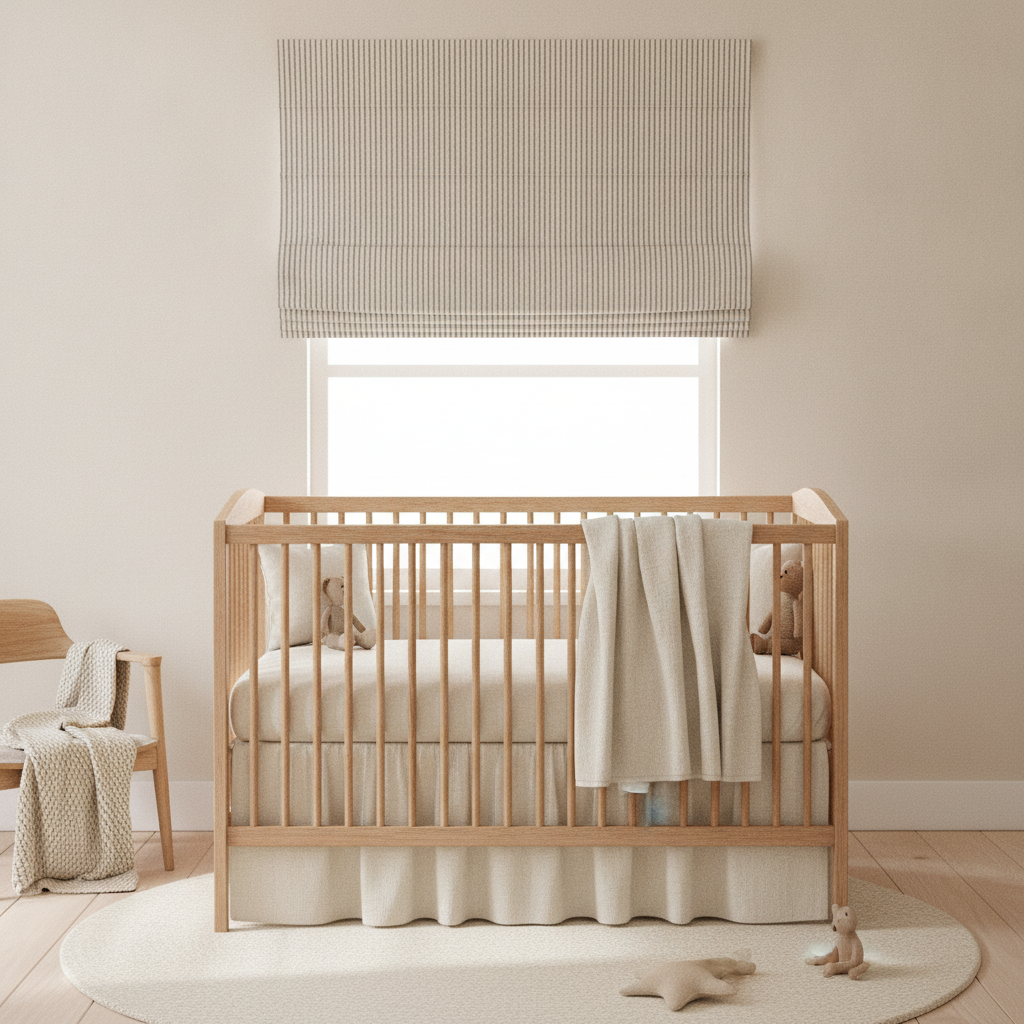
A cottagecore nursery with a simple wooden crib, a window with a Roman blind in cream and micro black ticking stripe, and warm off-white walls.

Creating a Serene Cream Cottagecore Nursery

Designing a nursery offers a unique opportunity to craft a truly special space. For parents seeking a calming and inviting atmosphere that feels both fresh and nostalgic, a cream cottagecore nursery is an ideal choice. This style leans into natural textures, soft tones, and a gentle aesthetic, providing a peaceful haven for your baby without being overly themed or cluttered. With cream as the unifying colour, the room maintains an airy feel while embracing warmth and comfort.

The Foundation: Cream Walls and Natural Light

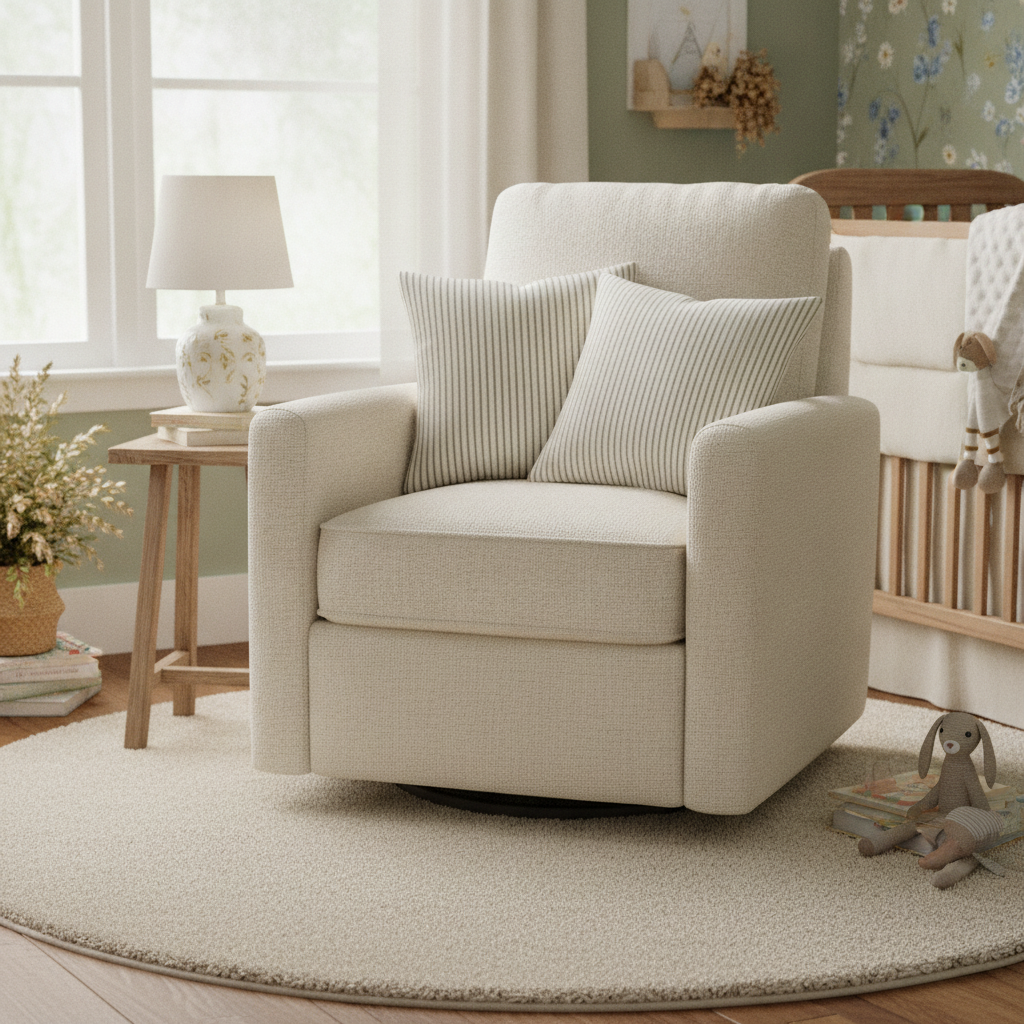
A cream glider armchair in a nursery, featuring two striped cushions made from cream and micro black ticking fabric, sitting on a fluffy cream rug.

Start with your wall colour. A warm, inviting off-white sets the perfect backdrop for a cottagecore nursery. Consider a shade like Farrow & Ball’s "Wimborne White" for its soft, creamy undertones that prevent the room from feeling stark. Apply this same colour to the ceiling and trim for a cohesive, seamless look that expands the sense of space. Embrace natural light by keeping window treatments simple yet effective.

Textural Harmony with Micro Coal Black Antique Vintage Mattress Ticking Stripe on Cream

The essence of cottagecore lies in its understated charm and use of classic patterns. Our Micro Coal Black Antique Vintage Mattress Ticking Stripe on Cream fabric, with its micro coal black antique vintage mattress ticking stripe on cream, is a perfect fit. This fabric, tagged as antique, classic, and cottagecore, offers a timeless touch without overwhelming the gentle cream palette. Its subtle striped motif introduces visual interest and a sense of heritage.

Primary Use: A Roman Blind for Soft Light Control
Employ this fabric for a Roman blind on the nursery window. A Roman blind provides excellent light control, allowing for soft, filtered light during the day and complete darkness for naps. For a standard window measuring 90 cm wide by 120 cm high, the finished blind should cover the window frame, typically finishing at about 125 cm in drop. You would require approximately 1.8 meters of fabric (assuming a standard fabric width of 140 cm) to account for seam allowances, rod pockets, and top/bottom hems. The micro stripe ensures that the pattern remains delicate, even when gathered.

Secondary Use: A Custom Changing Pad Cover
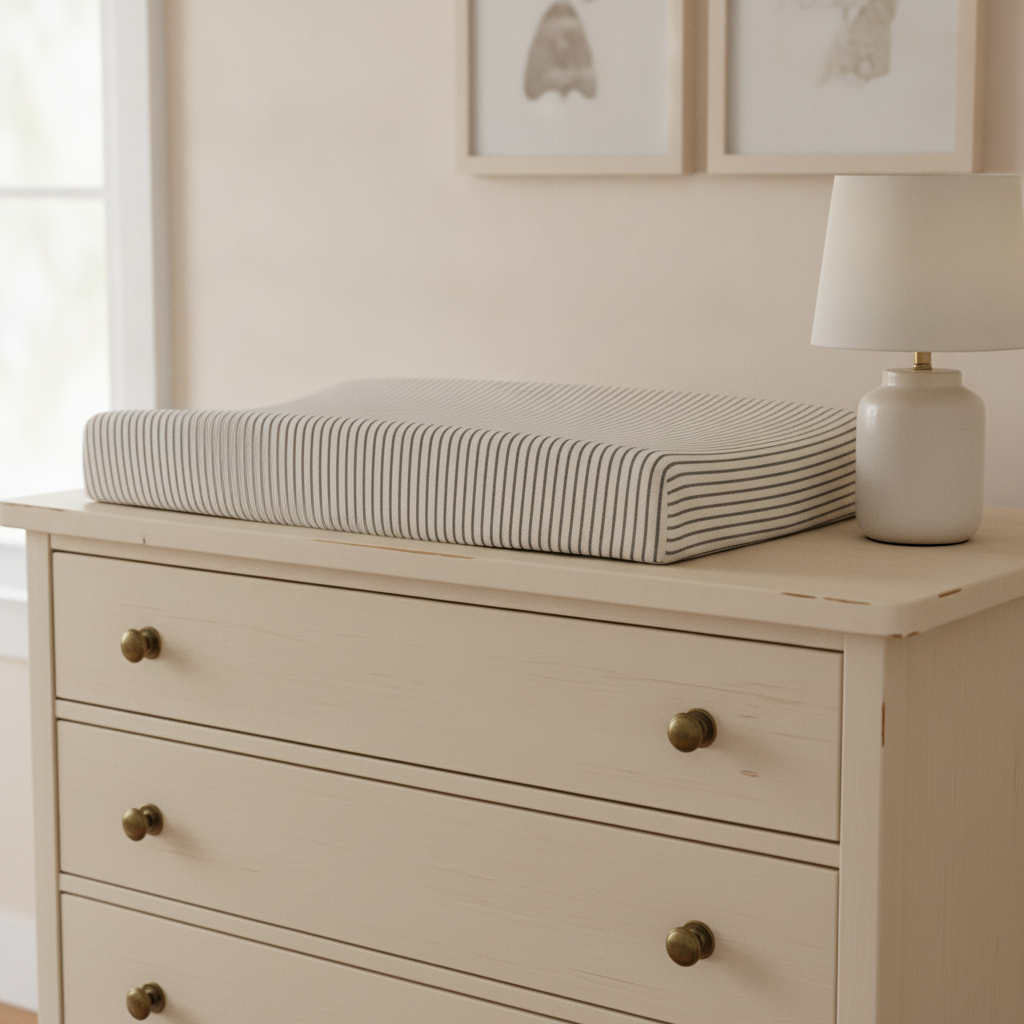
Extend the charm of this ticking stripe by crafting a custom changing pad cover. The durable nature of mattress ticking makes it suitable for everyday use, and the cream and micro coal black stripe adds a touch of bespoke detail to a functional item. You’ll need about 1 meter of fabric for a standard 40 cm x 80 cm changing pad, accounting for depth and elastic casing.

Furniture and Finishes: A Blend of Vintage and Practical

A cream-painted vintage dresser with aged brass pulls, a changing pad covered in cream and micro black ticking stripe fabric, and a small lamp.

Opt for furniture with gentle curves and a natural finish. A wooden crib in a light, natural oak or a vintage dresser painted in a shade matching "Wimborne White" would be ideal. Hardware can make a significant difference; swap out any modern pulls for aged brass knobs or cup handles. For example, solid brass pulls with an aged finish add warmth and character to a dresser or wardrobe.

A comfortable glider or armchair is essential for a nursery. Dress it with soft cushions made from our Micro Coal Black Antique Vintage Mattress Ticking Stripe on Cream fabric. Two cushions, each measuring 45 cm x 45 cm, placed approximately 30 cm apart on the glider, will provide both comfort and visual continuity. Each cushion typically requires about 0.5 meters of fabric for an envelope-style cover.

Bringing in the Details: Warmth and Whimsy

Layering textures is key to cottagecore. Introduce a plush cream wool rug, or a natural jute rug for grounding the space. Consider open shelving with woven baskets for toy storage, adding to the room’s organic feel. For lighting, choose fixtures that emit a warm glow. A pendant light with a fabric shade (perhaps in a cream linen) centered over the crib area, combined with a small bedside lamp on the dresser with a ceramic base in a muted tone, provides ambient and task lighting. Ensure all lighting is on dimmers for gentle transitions.

Accessories should be simple and heartfelt. Display a few framed botanicals or gentle watercolour animal prints in light wood frames. A small collection of wooden toys on a shelf or tucked into a woven basket reinforces the natural aesthetic. A small dried flower arrangement of lavender or eucalyptus adds a subtle fragrance and a touch of the outdoors.

Your Step-by-Step Guide: Crafting a Ticking Stripe Cushion Cover

Give your nursery glider a personal touch by sewing a simple envelope-style cushion cover using our Micro Coal Black Antique Vintage Mattress Ticking Stripe on Cream fabric. This project is perfect for beginners and adds a bespoke element to the room.

  1. Measure and Cut Fabric: For a 45 cm x 45 cm cushion insert, cut one front piece measuring 47 cm x 47 cm (allowing for 1 cm seam allowance on all sides). For the back, cut two pieces, each 47 cm wide x 30 cm high.
  2. Hem Back Pieces: Along one 47 cm edge of each back piece, fold over 1 cm, press, then fold over another 2 cm, and press again. Stitch this hem in place to create a neat finished edge for the envelope opening.
  3. Assemble the Cover: Place the front piece right side up. Place one back piece right side down on top of the front, aligning the raw edges at the top. Place the second back piece right side down on top of the front, aligning the raw edges at the bottom. The two hemmed edges of the back pieces will overlap in the middle.
  4. Stitch the Edges: Pin all around the perimeter. Stitch with a 1 cm seam allowance around all four sides. Backstitch at the start and end of your seams for security.
  5. Finish and Turn: Trim the corners diagonally to reduce bulk. Turn the cushion cover right side out through the envelope opening. Push out the corners gently to create crisp points. Insert your 45 cm x 45 cm cushion.

What to Avoid: Common Missteps in a Cottagecore Nursery

  • Stark White Paint: Avoid cold, brilliant white paints that can feel unwelcoming. Always opt for an off-white with warm undertones to maintain a soft atmosphere.
  • Overly Themed Decor: While cottagecore has a distinct feel, resist the urge to fill the room with too many overtly "cute" or matchy-matchy items. Focus on textures and natural elements instead.
  • Harsh Lighting: Bright, unshaded overhead lights can disrupt a calm environment. Prioritize soft, diffused light from multiple sources and always use dimmers.
  • Synthetic Textures: Steer clear of shiny polyesters or plastics. Embrace natural materials like cotton, linen, wool, wood, and wicker to enhance the authentic cottagecore feel.
  • Clutter: A serene space is an organized space. Incorporate storage solutions like woven baskets and closed cabinetry to keep toys and baby essentials neatly out of sight when not in use.

A Rustic Green Christmas Living Room: Crafting Warmth for the Holidays

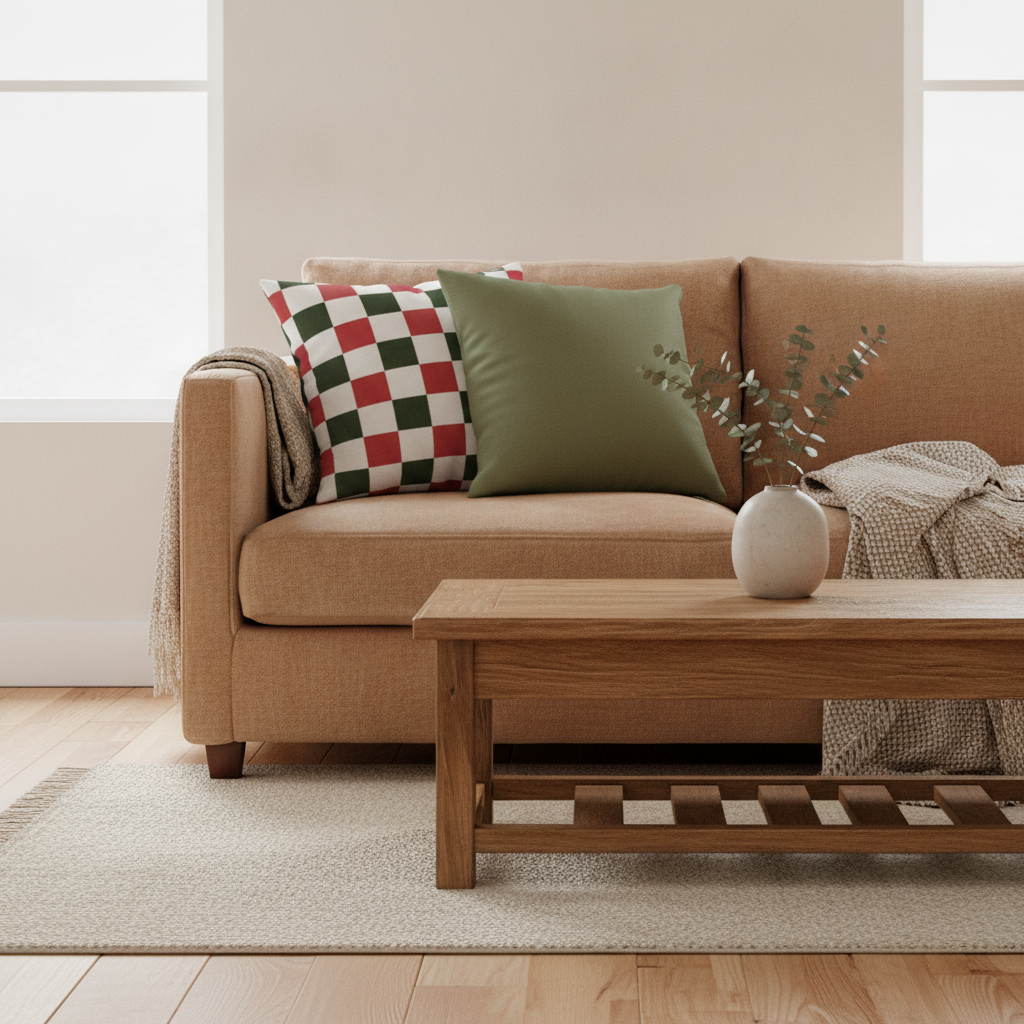
A warm and inviting rustic living room with a beige sofa, two reversible cushions showing green checkered and olive solid sides, a low wooden coffee table, and soft lighting.

Preparing Your Living Room for a Rustic Green Christmas

The festive season means preparing your home for warmth and comfort. Instead of a complete overhaul, focus on adding seasonal layers that integrate with your existing decor and can be easily stored. This Christmas, we’re diving into a rustic living room, anchored by calming greens and natural textures, ready for the cheer of December. Our approach prioritizes useful, storable pieces, ensuring your efforts enhance your home not just for Christmas, but also for the eleven months that follow. We’ll guide you through practical makes, suggest when to start, and offer concrete advice for a truly cohesive look.

Setting the Foundation: Window Treatments

Window treatments are an excellent way to introduce seasonal colour and pattern. They are also easily swapped out or stored when the holidays conclude.

Charming Cafe Curtains

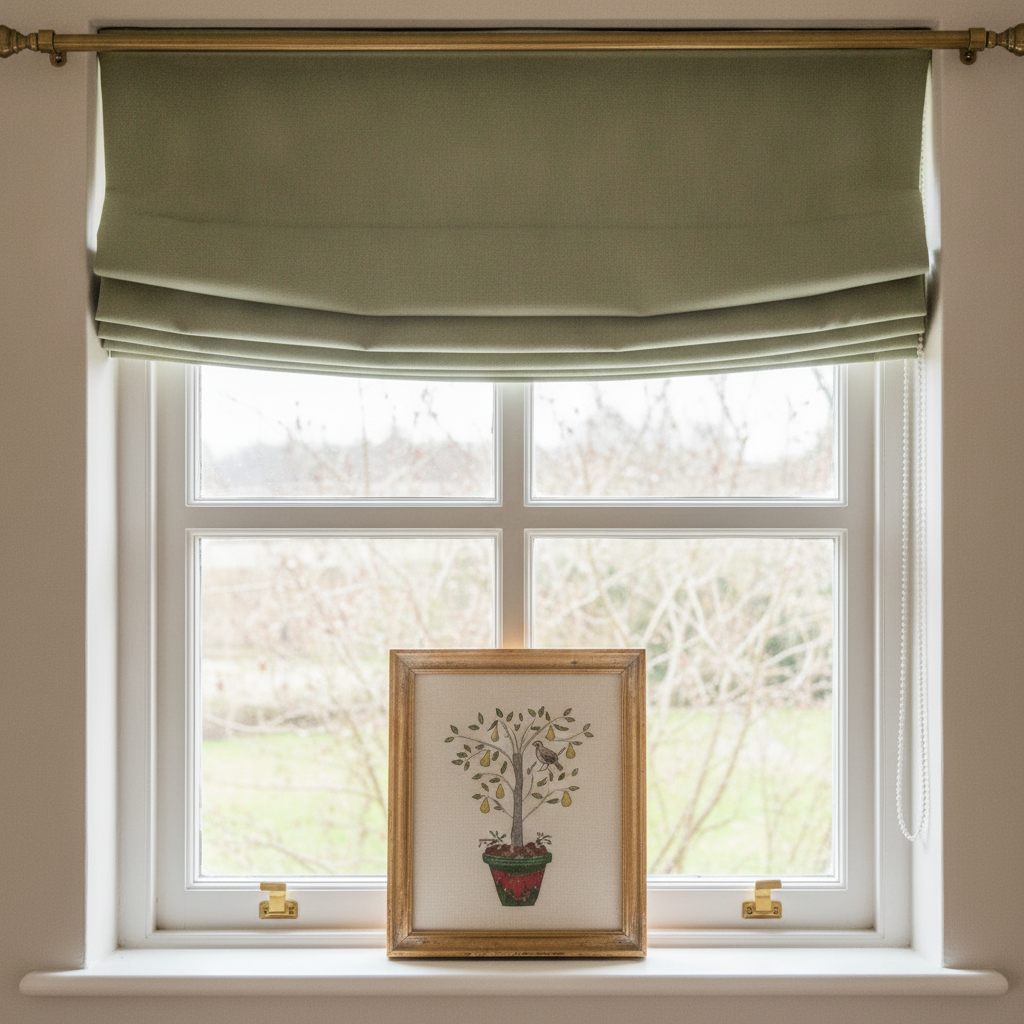
A window in a rustic living room with a muted olive green Roman blind, an aged brass curtain rod visible, and a small, framed fabric image of a partridge in a pear tree on the sill.

For a relaxed, inviting feel, consider cafe curtains made from our 4 inch Vintage Cranberry and Green Christmas Checkered Pattern fabric. This vintage-inspired Christmas checkered fabric features cranberry red, dark green, and white squares, offering a classic plaid look perfect for seasonal crafts and home decor. Hang these at approximately two-thirds up your window frame, leaving the top third clear for maximum natural light while still offering privacy.

For a window 90 cm wide, you’ll need two panels, each at least 70 cm wide for sufficient gather, plus 10 cm for side hems (5 cm per side) and 20 cm for top and bottom hems (10 cm per hem). This makes each panel roughly 1 meter in length. For two panels, you would need approximately 2.2 meters of fabric. Allow a full afternoon for measuring, cutting, and sewing a pair of cafe curtains.

Tailored Roman Blinds

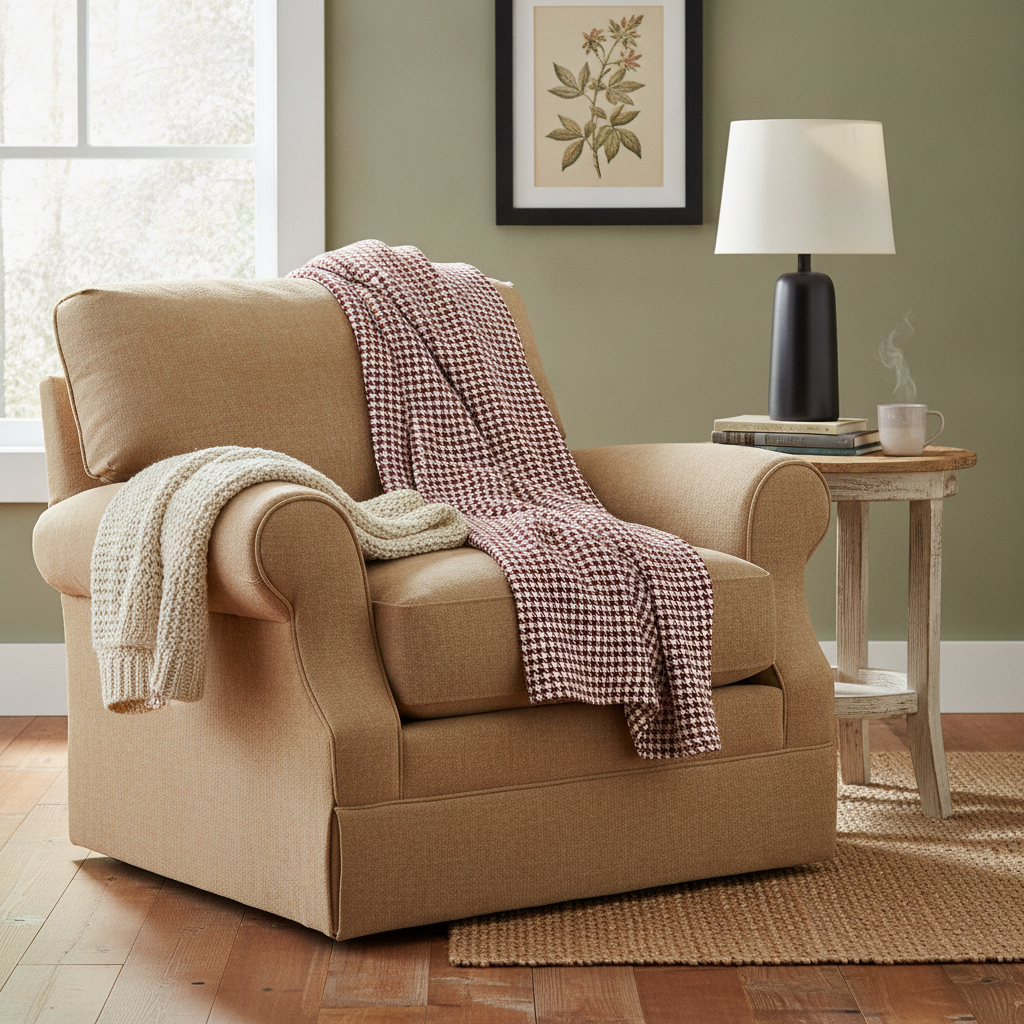
A close-up of a cozy reading nook in a rustic living room, showing a cream armchair, a throw blanket with a bold dark red houndstooth edge, and a dark ceramic lamp on a wooden side table.

For larger windows or a more tailored appearance, Roman blinds offer a clean, sophisticated look. Use our Reindeer Olive Muted Earthy Green Christmas Solid with Woodland Charm fabric. This muted olive green, inspired by reindeer moss and forest evergreens, brings natural warmth and woodland charm to rustic Christmas projects and decor. It acts as a versatile solid that grounds other patterns and introduces a key earthy green tone.

A Roman blind should finish 1-2 cm above the windowsill for an inside mount, or 10-15 cm below the window frame for an outside mount. For a standard window 120 cm wide by 150 cm high, you’d need approximately 1.7 meters of fabric for the main panel, allowing for hems and rod pockets. Expect a Roman blind to take a full day to make, or a weekend if you’re new to the project. Start this project no later than early November to ensure it’s ready for December.

Cozy Accents: Cushions and Throws

Cushions and throw blankets are essential for making a living room feel inviting, and they are excellent vehicles for seasonal changes.

Reversible Cushions for Versatility

Combine the patterns from your window treatments for cohesive scatter cushions. For a standard 45×45 cm (18×18 inch) cushion cover, you’ll need approximately 50 cm of fabric for each side, plus seam allowances. Use the 4 inch Vintage Cranberry and Green Christmas Checkered Pattern for one side and the Reindeer Olive Muted Earthy Green Christmas Solid with Woodland Charm for the other, allowing you to flip them for different looks throughout the season.

On a 2-seater sofa, place two such cushions, spaced 30-40 cm apart. For a longer sofa, add a third cushion in the centre. Cushion covers are quick to sew, typically taking 1-2 hours each, so you can start these in mid-November.

Small Details and Unexpected Touches

Introduce smaller, charming details with our Mini 12 Days of Christmas Partridge in a Pear Tree fabric. This fabric features the traditional song’s Partridge in a Pear Tree motif in a mini scale, in classic Christmas red and green. It’s perfect for small, meaningful details like decorative mug rugs, small sachets, or even fabric gift tags. Beyond these, this fabric can be framed as a small art piece for a bookshelf, adding a subtle nod to the holidays without being overwhelming. Simply cut a 20×20 cm square, iron it smooth, and place it in a rustic wooden frame.

For a bold accent, incorporate the Dark Christmas Candy Apple Red Houndstooth Check. This fabric features a large, dark, candy apple red houndstooth check, bringing a bold touch of festive red to your decor. Use it as the backing for smaller decorative cushions to add depth and a vibrant contrast, or as a striking border on a plain green throw blanket.

DIY Project: Reversible Christmas Cushion Cover

This simple project is perfect for adding handmade charm. Allow 1-2 hours per cushion.

Materials:

Steps:

  1. Cut two squares, 47×47 cm, one from each fabric, allowing for 1 cm seam allowances.
  2. Place the two fabric squares right sides together, aligning all edges. Pin securely around the perimeter.
  3. Stitch around all four sides with a 1 cm seam allowance, leaving a 30 cm opening on one side for turning and inserting the cushion. Remember to backstitch at the start and end of the opening to secure the stitches.
  4. Clip the corners diagonally close to the stitching to reduce bulk once turned, being careful not to cut through your stitch line.
  5. Turn the cushion cover right side out through the opening. Gently push out the corners with a blunt tool, such as a chopstick or point turner.
  6. Press all the seams flat with an iron. Turn under the raw edges of the opening by 1 cm and press them neatly into place.
  7. Topstitch the opening closed by hand using a ladder stitch for an invisible finish, or carefully machine stitch close to the edge for a quicker method.
  8. Insert your 45×45 cm cushion pad.

The Bigger Picture: Paint and Hardware

Ensure your permanent fixtures support the rustic Christmas aesthetic.

For the walls, choose a warm, muted off-white to allow your fabrics to shine. Try Farrow & Ball’s ‘Skimming Stone’ or Little Greene’s ‘Slaked Lime Mid’ for a gentle, creamy backdrop. If you prefer a subtle green wall, ‘Pigeon’ by Farrow & Ball offers a historical, earthy green that complements rustic textiles beautifully. Select hardware that leans into the rustic feel – think aged brass for a warm glow, or a matte black finish for a more understated, robust look on curtain rods, door handles, or cabinet pulls.

What to Avoid

To keep your rustic green Christmas living room feeling authentic and cohesive, steer clear of these common pitfalls:

  • Over-cluttering surfaces with too many small, unrelated knick-knacks. Focus on a few well-chosen, larger items that make an impact.
  • Bright, primary reds or greens that clash with the muted, earthy tones of the rustic style. Stick to cranberry, olive, and forest greens.
  • Shiny, modern finishes on ornaments or decor. Opt for matte, natural, or aged textures like wood, burlap, or ceramic.
  • Too many conflicting patterns. While mixing patterns is good, ensure one or two are dominant, with others acting as subtle accents.

Storing Your Seasonal Pieces

To ensure your festive decor lasts for years, store fabric items clean and flat in breathable cotton storage bags or acid-free tissue paper. Keep them in a cool, dry place like a closet, linen cupboard, or under a bed. This prevents creasing, protects against dust and moisture, and ensures they’re ready for next year’s run-up to Christmas.

By incorporating these thoughtful, handcrafted elements, your living room will feel prepared and cozy for the Christmas season, ready to welcome guests and create lasting memories. Start now, and enjoy the process of making your space truly festive and unique.

Making Waves: Designing a Modern Blue Bathroom

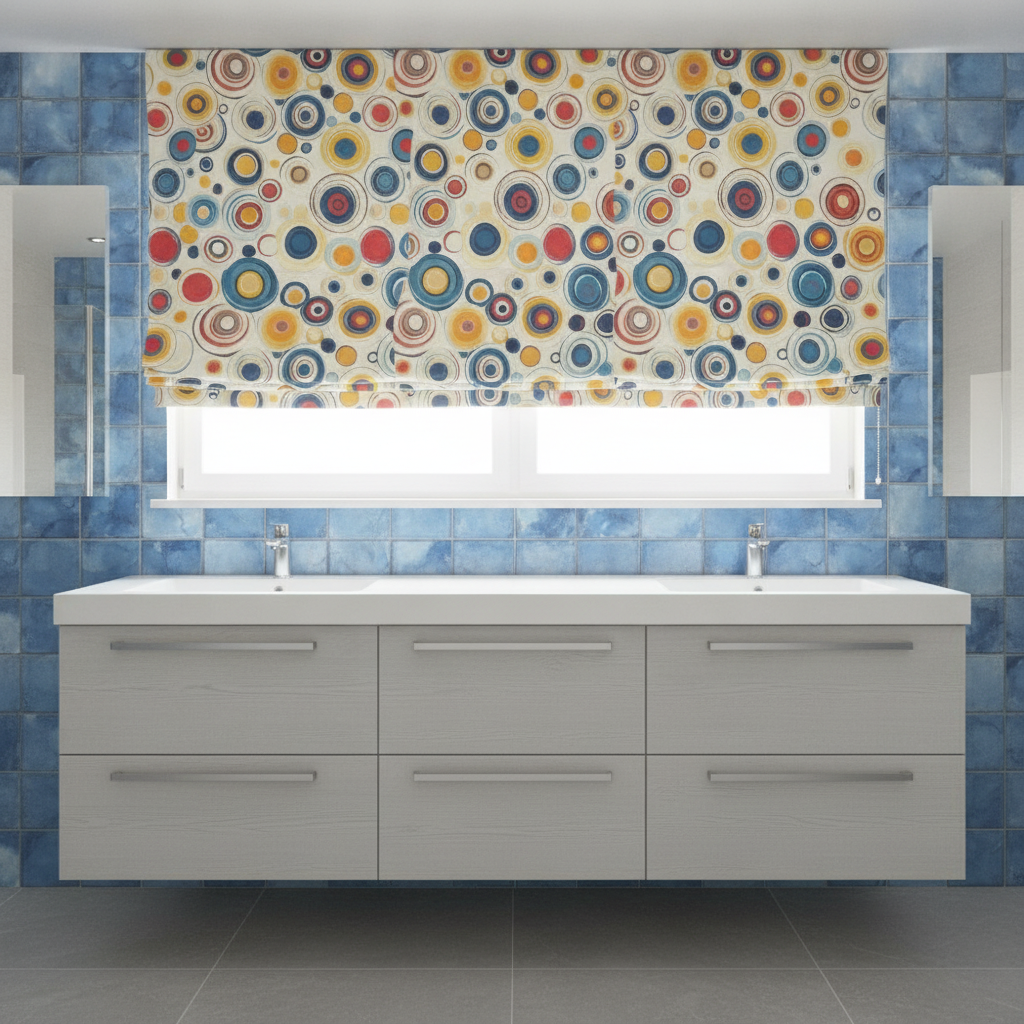
Modern bathroom vanity with a geometric blue and yellow abstract pattern Roman blind over the window.

Dive Into Serenity: Your Modern Blue Bathroom Awaits

Transforming a bathroom often starts with a vision, and for a space that blends contemporary style with soothing comfort, blue is an undeniable hero. A modern blue bathroom is a sanctuary, offering a refreshing escape that feels clean, expansive, and utterly chic. Forget chilly or clinical – with the right textures, patterns, and thoughtful details, blue can bring warmth and depth to your daily routine.

The Foundation: Choosing Your Blues and Neutrals

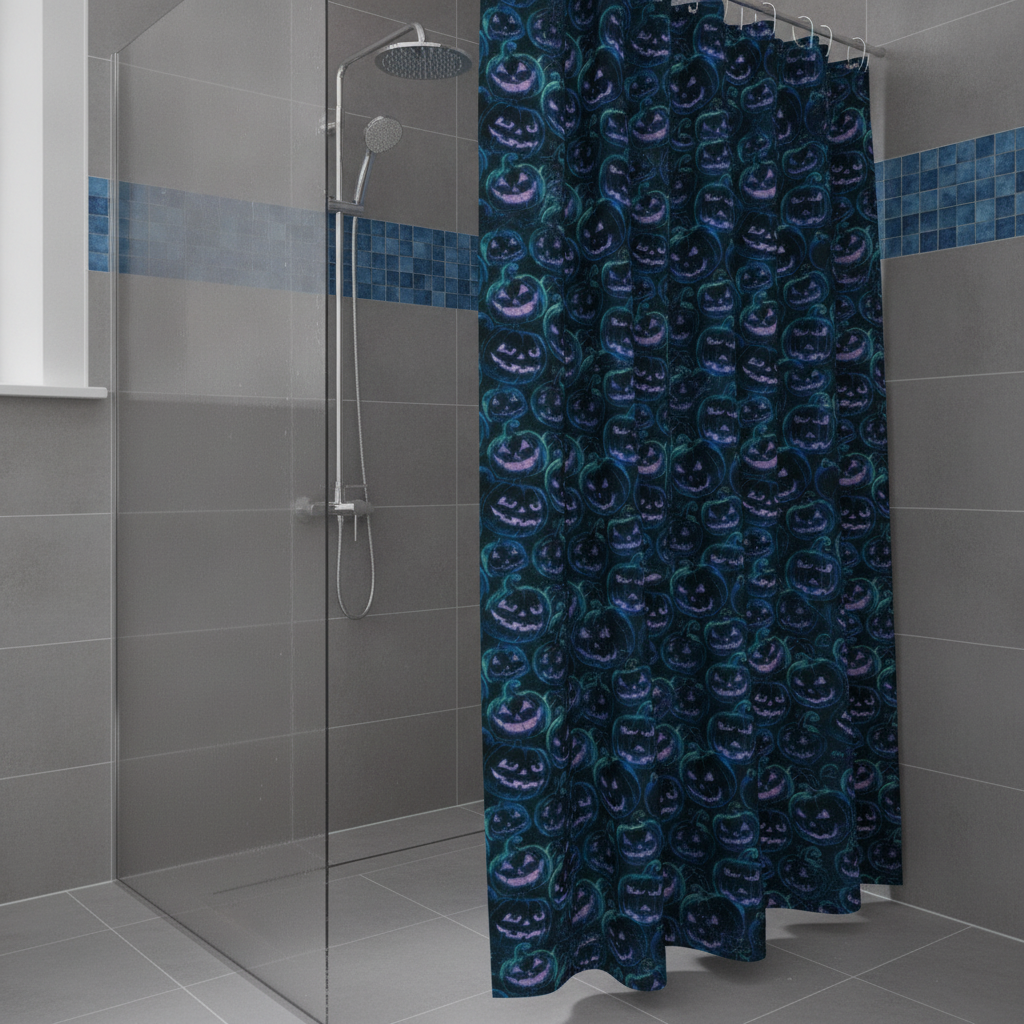
Shower curtain with neon blue and pink glowing pumpkin pattern in a contemporary blue bathroom.

A modern blue bathroom doesn’t mean everything has to be blue. Instead, layer shades and introduce crisp neutrals. For walls, consider a soft off-white like Farrow & Ball’s Wimborne White, a warm, versatile white that creates a soft backdrop without feeling stark. Alternatively, Benjamin Moore’s White Dove offers a slightly crisper, yet still inviting, neutral base. For a bolder accent, a deeper, muted blue like Sherwin-Williams’ Naval on a single wall can add significant depth. Pair these with hardware in polished chrome for a sleek, contemporary feel, or opt for brushed nickel to soften the modern edge slightly. Matte black hardware also offers a striking contrast that enhances a minimalist aesthetic.

Pattern Play: Introducing Our Designs

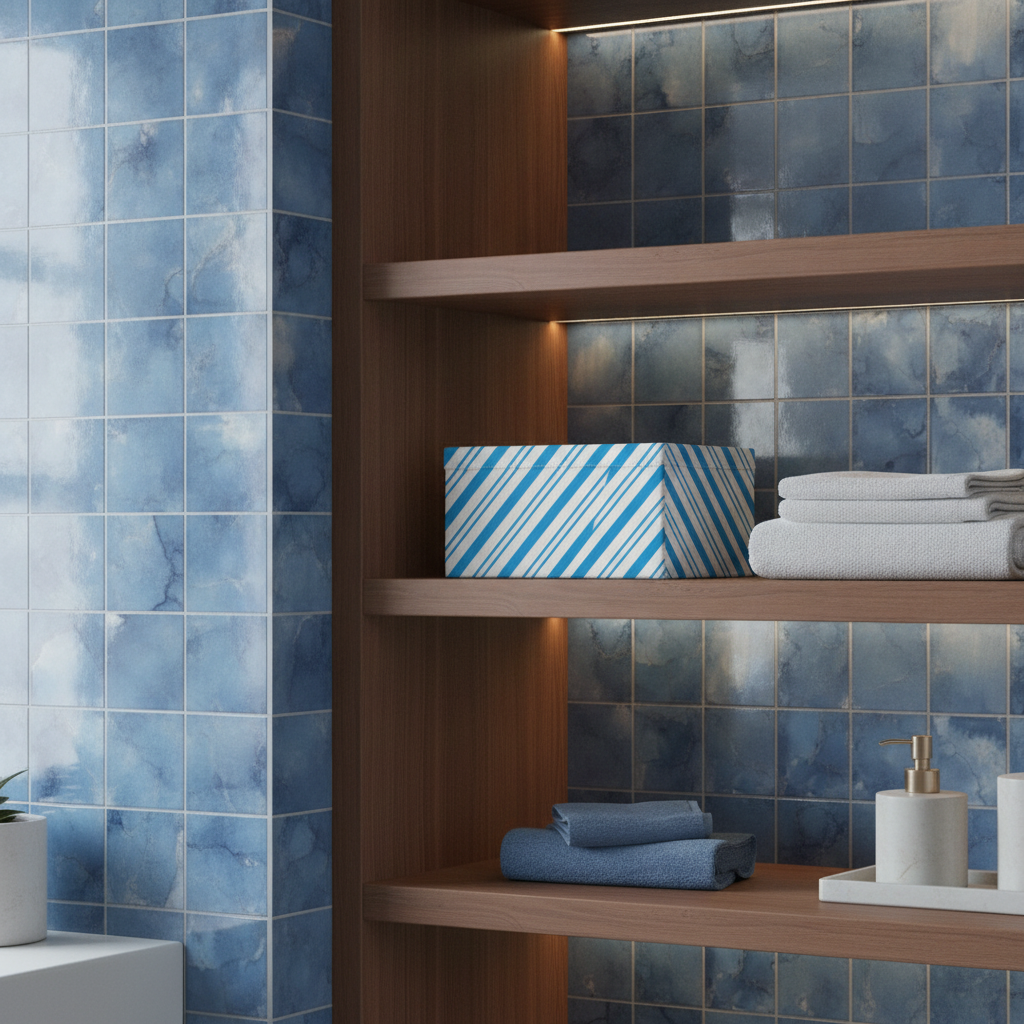
Open shelving in a modern bathroom featuring a striped blue and white fabric storage box.

Fabric is an often-overlooked element in bathroom design, yet it offers an incredible opportunity to infuse personality and texture. Here’s how our patterns can define your modern blue retreat:

1. Dynamic Accents with Neon Blue and Pink Halloween Pumpkins

Don’t let the name limit your imagination! Our Neon Blue and Pink Halloween Pumpkins Glowing in the Dark fabric features vibrant neon blue jack-o’-lanterns with glowing pink faces set against a dark backdrop. The “modern” and “whimsical” tags are key here. Imagine this playful design as a shower curtain, bringing an unexpected pop of electric color and graphic interest. For a standard 1.8m wide shower, you’d typically need a panel roughly 1.8m to 2.2m wide for a gathered look, with a drop of 1.8m to 2m, depending on your shower rod height. This pattern also excels as a vibrant lining for storage baskets under the vanity, or as a set of small accent cushions (e.g., 30x30cm) on a freestanding stool.

2. Geometric Flair with Retro Abstract Circles

For a clean, artistic statement, consider the Retro Abstract Circles with Blue and Yellow on Light Background fabric. This bold abstract design featuring vibrant blue and yellow concentric circles set against a light background, exuding a “modern” and “playful” vibe. It’s ideal for a Roman blind in a bathroom window. For a window measuring 0.9m wide by 1.2m high, aim for the finished blind to be 1-2 cm wider than the window frame (approx. 0.92-0.94m) and to finish 1-2 cm below the sill when lowered. This requires about 1.5m of fabric, allowing for pattern matching and hem allowances. Beyond blinds, this geometric wonder could be stretched over a simple canvas frame to create custom wall art, instantly adding a focal point and a dose of contemporary design.

3. Understated Charm with Classic Blue Diagonal Christmas Candy Stripes

The Classic Blue Diagonal Christmas Candy Stripes fabric offers an old blue diagonal stripes pattern on a clean white background. Its “modern” and “artistic” tags highlight its versatility beyond seasonal decor. This pattern is perfect for a set of chic hand towels or a cafe curtain. For a cafe curtain, hang the rod approximately two-thirds of the way up the window (e.g., for a 1.2m high window, the rod would be at 0.8m). A curtain with a finished drop of 40-50cm and gathered to 1.5-2 times the window width will offer privacy and style. An alternative use for these distinctive stripes is creating a custom fabric bath mat (using a non-slip backing), adding a tailored, unexpected detail underfoot.

4. Serene Sophistication with Blue Mosaic Tiles

To evoke a spa-like tranquility, the 6 inch Blue Mosaic Tiles with Watercolor Effect for Pool or Bathroom fabric is a natural fit. These elegant blue mosaic tiles with a subtle watercolor effect are specifically described as “perfect for adding a refreshing touch to pool areas, bathrooms, or spa decor.” Use this “modern” and “refreshing” pattern as a seamless shower curtain for a cohesive look, requiring similar dimensions to the pumpkin print. Another creative application is using it to cover flat cabinet doors or the front panel of a built-in bathtub, adhering it with fabric adhesive for a bespoke, tiled appearance without the grout.

Step-by-Step: Crafting a Custom Fabric Storage Box

Adding fabric-covered storage boxes is a simple way to introduce patterns and organize clutter. Here’s how to make one using your chosen Paper & Frill fabric:

  1. Gather Your Materials: You’ll need a plain cardboard or plastic storage box (e.g., 30x30x30cm), your chosen fabric (approx. 1.2m x 1.2m for a 30cm cube, accounting for wrap-around), fabric adhesive spray or strong craft glue, scissors, and a ruler.
  2. Measure and Cut Fabric: Measure each side of the box, adding 2-3 cm extra on all edges for wrapping. Cut fabric panels for each exterior side (four sides, plus top and bottom if desired). For a seamless look, measure the total perimeter and height, adding 5cm to the height and 10cm to the length to wrap around edges.
  3. Apply Fabric to Box: Start with the longest side. Spray adhesive evenly on one side of the box and carefully press the fabric onto it, smoothing out any bubbles. Wrap the excess fabric neatly around the edges, securing with more glue on the inside.
  4. Continue Wrapping: Repeat for the remaining sides, ensuring the pattern aligns as best as possible at the corners. For the bottom and inside edges, fold the fabric neatly and glue it down to create a clean finish.
  5. Finish the Inside (Optional): If your box has a separate lid or you want to line the interior, cut and glue fabric panels for these sections as well, creating a truly custom and durable storage solution.

What to Avoid in Your Modern Blue Bathroom

  • Too Much of One Blue: A monochromatic blue scheme can feel flat. Introduce variations in shade, texture, and other neutral colors to add interest.
  • Over-Themed Decor: While a playful pattern is great, avoid multiple blue fish motifs or nautical anchors. Focus on sophisticated patterns and a clean aesthetic.
  • Fussy Details: Modern design thrives on clean lines and uncluttered spaces. Steer clear of excessive frills, ornate hardware, or heavy drapery.
  • Poor Lighting: A well-lit bathroom is essential. Ensure a mix of task lighting (e.g., around the mirror) and ambient lighting, using fixtures with a contemporary design.

A modern blue bathroom doesn’t just look good; it feels good. By thoughtfully selecting patterns, colors, and finishes, you can create a space that is both functional and a true reflection of contemporary calm.

Art Deco Aqua Haunts: Transforming Your Bedroom for Halloween Elegance

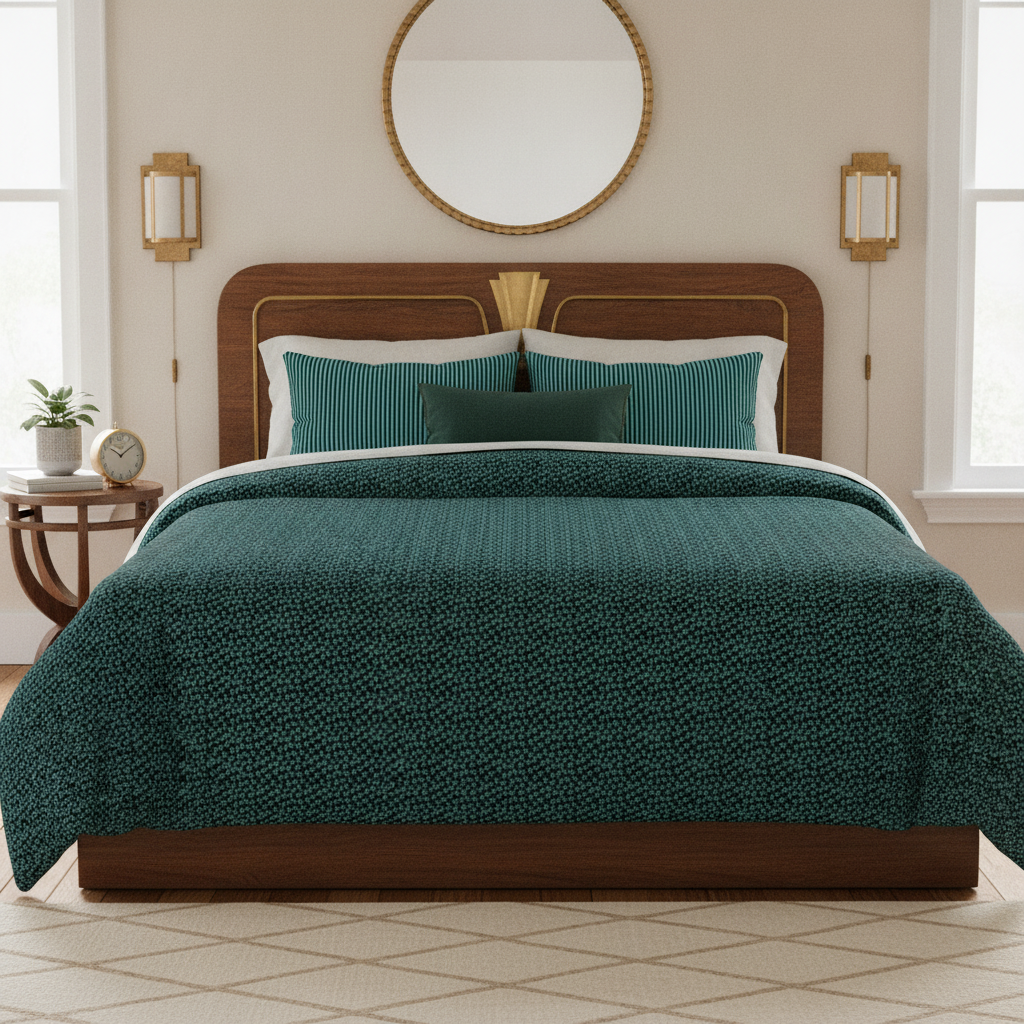
An Art Deco bedroom features a bed with a duvet cover showing aqua Jack o' lantern faces on black, striped pillows, light off-white walls, and aged brass fixtures.

Elevate Your Autumn Nights with Sophisticated Spookiness

As the leaves begin to turn and the nights draw in, the anticipation of Halloween fills the air. It’s a time for cozy evenings, festive preparations, and perhaps a touch of elegant macabre in our homes. But how do you infuse your personal sanctuary – your bedroom – with seasonal charm without sacrificing style? At Paper & Frill, we believe in creating spaces that are both practical for everyday living and delightfully on-theme for special occasions. This year, we’re drawing inspiration from the timeless glamour of Art Deco, marrying it with a cool, unexpected aqua blue palette for a sophisticated Halloween bedroom.

The key to successful seasonal decorating, especially in a private space like the bedroom, lies in thoughtful, temporary additions. Our goal is to craft a Halloween look that feels integrated and refined, not a fleeting novelty. These pieces should be easy to introduce, enjoy, and then store away, allowing your room to revert to its year-round comfort. We’ll focus on textiles that bring the Art Deco lines and our unique Halloween patterns to life, ensuring your bedroom is ready for spooky season with panache.

The Art Deco Palette: Aqua, Black, and a Hint of Monster Green

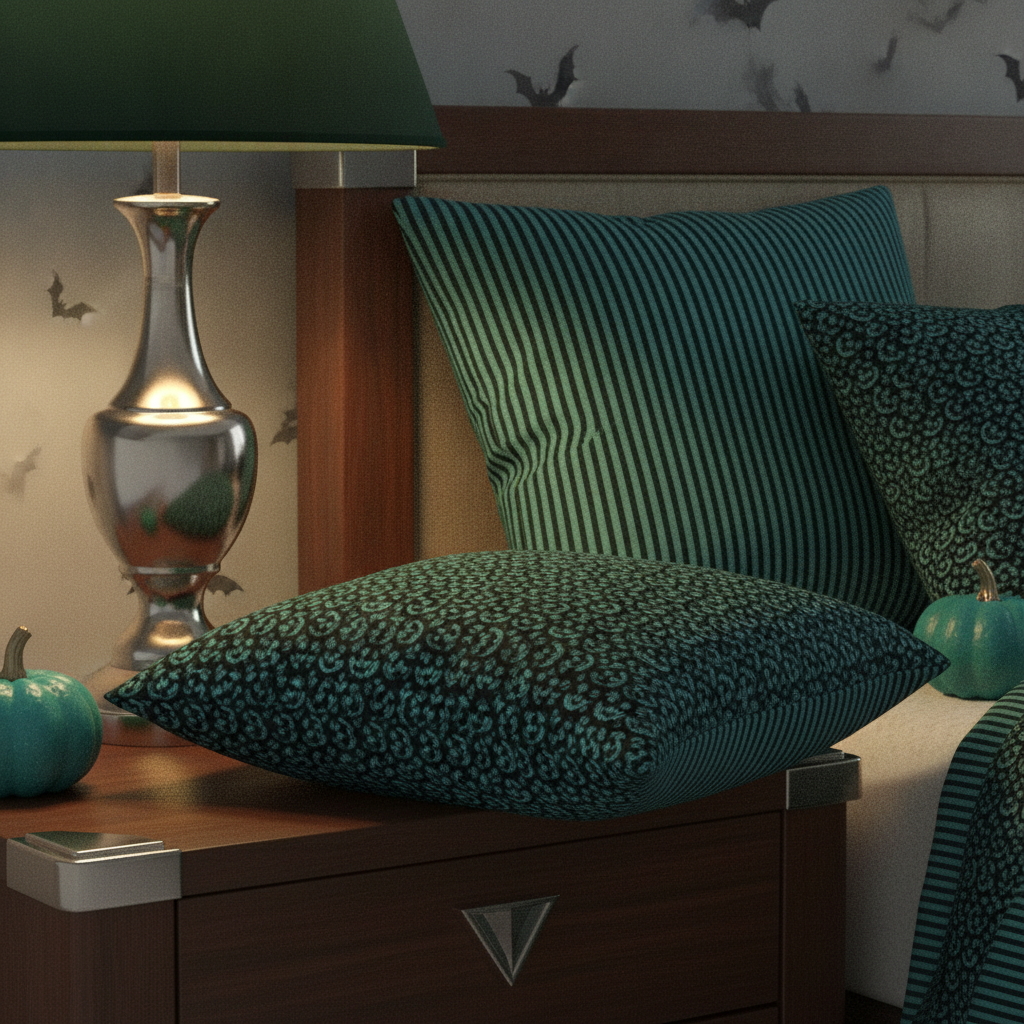
A close-up of a bedside table in an Art Deco Halloween bedroom with a reversible cushion: one side with aqua and black stripes, the other with aqua grinning faces, beside a lamp with a polished nickel base.

Art Deco often conjures images of deep jewel tones, metallics, and sleek geometric patterns. For our Halloween bedroom, we’re translating this into a striking combination of aqua and black, softened by a touch of coordinating green. This palette provides a dramatic yet calming backdrop, perfect for those long autumn nights.

Let’s build this look with our specially designed fabrics:

  • For a striking focal point: Consider a duvet cover or main pillow shams made from Micro Grinning Halloween Aqua Faces on Black. This fabric features scary grinning Jack o’ lantern faces in aqua on a black background. The micro scale of the faces offers a subtle nod to Halloween when viewed from a distance, while revealing its playful side up close. For a queen-sized duvet cover (230cm x 220cm), you’ll need approximately 6.5 meters of fabric for both sides, allowing for pattern matching and seams.
  • For elegant accents: Complement the grinning faces with the crisp lines of Micro Thin Halloween Stripes in Aqua and Black. These narrow micro thin stripes in aqua and black are designed to coordinate perfectly. Use them for accent pillow piping, a tailored bed skirt, or even a chic Roman blind. A Roman blind for a standard 120cm wide by 150cm drop window would require about 2 meters of fabric, including extra for headers, hems, and rod pockets. The blind should finish 1cm above the windowsill for a clean, tailored look.
  • For grounding and contrast: Introduce depth with Monster Green Solid Coordinate for Halloween Grinning Faces. This Monster Green Solid color is designed to match both the Grinning Faces and Micro Stripes collections. It’s ideal for the reverse side of a duvet cover, solid throw pillows, or even a soft bed runner at the foot of the bed.
  • For a touch of whimsy: Inject some playful charm with Cute Halloween Monster Watercolor Doodles in Bright Colors. This fabric showcases adorable and whimsical mythical Halloween monsters in bright colors. While its bright palette makes it an accent piece, it’s perfect for a small, reversible cushion or a framed piece of wall art that can be easily swapped out. As an alternative to a traditional framed print, this fabric would make an interesting backing for a tray on your bedside table, protected by a glass insert.

Making Your Mark: A Reversible Art Deco Halloween Cushion

A tailored Roman blind made of aqua and black micro thin striped fabric hangs in an Art Deco Halloween bedroom window, with monster green solid throw pillows visible nearby.

Creating custom textiles allows for a truly unique expression of your style. A reversible cushion cover is a simple, impactful project that can be completed in an afternoon.

Time Needed: 2-3 hours. Start Date: Aim for early October to enjoy it all month.

  1. Gather Your Materials: You will need 0.5 meters of Micro Grinning Halloween Aqua Faces on Black fabric, 0.5 meters of Micro Thin Halloween Stripes in Aqua and Black fabric, a 45cm x 45cm cushion insert, a sewing machine, coordinating thread, pins, fabric scissors, and an iron.
  2. Cut Your Fabric: From each fabric, cut two squares measuring 47cm x 47cm. This allows for a 1cm seam allowance on all sides. You will have two squares of Grinning Faces and two squares of Thin Stripes.
  3. Prepare the Back Panels: For each fabric (Grinning Faces and Thin Stripes), take one of the 47cm x 47cm squares and cut it horizontally across the middle, creating two pieces. On one of these pieces, fold one of the cut edges over by 1cm and press, then fold again by 2cm and press. Stitch this hem in place. Repeat for the other piece. These will form the envelope back closure.
  4. Assemble the Front: Take one full 47cm x 47cm square of the Micro Grinning Halloween Aqua Faces on Black. Lay it right side up.
  5. Layer the Back: Place your two hemmed back pieces from the Micro Thin Halloween Stripes in Aqua and Black onto the front piece, right sides together, overlapping them in the middle to create the envelope opening. Pin all around the edges.
  6. Stitch It Up: Stitch around all four sides of the cushion cover using a 1cm seam allowance. Trim the corners to reduce bulk.
  7. Finish: Turn the cushion cover right side out, push out the corners, and press. Insert your 45cm x 45cm cushion pad. You now have a reversible cover, showing the grinning faces on one side and the stripes on the other.

Finishing Touches: Paint and Hardware

The right foundational elements ensure your seasonal decor shines. For walls, consider a soothing, warm off-white like Farrow & Ball’s ‘Skimming Stone’. Its subtle warmth prevents the black and aqua from feeling too stark. If you desire a more dramatic statement, an accent wall painted in a deep charcoal or near-black, such as Farrow & Ball’s ‘Off-Black’, would perfectly frame the Art Deco aesthetic.

Hardware in an Art Deco bedroom should be refined. Opt for aged brass or polished nickel for curtain rods, lamp bases, and cabinet pulls. These finishes complement the aqua and black palette without competing with the textile patterns. Hang curtain rods high, approximately 15-20cm above the window frame, to create an illusion of height and elegance.

What to Avoid in Your Art Deco Halloween Bedroom

  • Overwhelming Orange: While iconic for Halloween, a dominant orange can clash with the sophisticated aqua and black Art Deco theme. Use it very sparingly, if at all.
  • Excessive Clutter: Art Deco thrives on clean lines and thoughtful placement. Avoid too many small, unrelated Halloween trinkets that can detract from the elegant aesthetic.
  • Permanent Themed Items: Resist the urge to paint furniture or install fixtures that are overtly Halloween-specific. Stick to textiles and easily removable decorative objects.
  • Poor Lighting: Harsh, bright lights can spoil the ambiance. Opt for soft, diffused lighting, perhaps with dimmer switches, to enhance the moody Art Deco feel.

Storing Your Seasonal Splendor

When the season concludes, carefully fold your custom duvet cover, cushion covers, and any other fabric elements. Store them in breathable fabric bags or airtight containers in a cool, dry place like a linen closet or under the bed. Label the containers clearly as “Halloween Bedroom Decor” for easy retrieval next year. This not only preserves your beautiful textiles but also ensures they’re ready for their next stylish appearance.

A Recipe for Charm: Designing Your Vintage Blue Kitchen

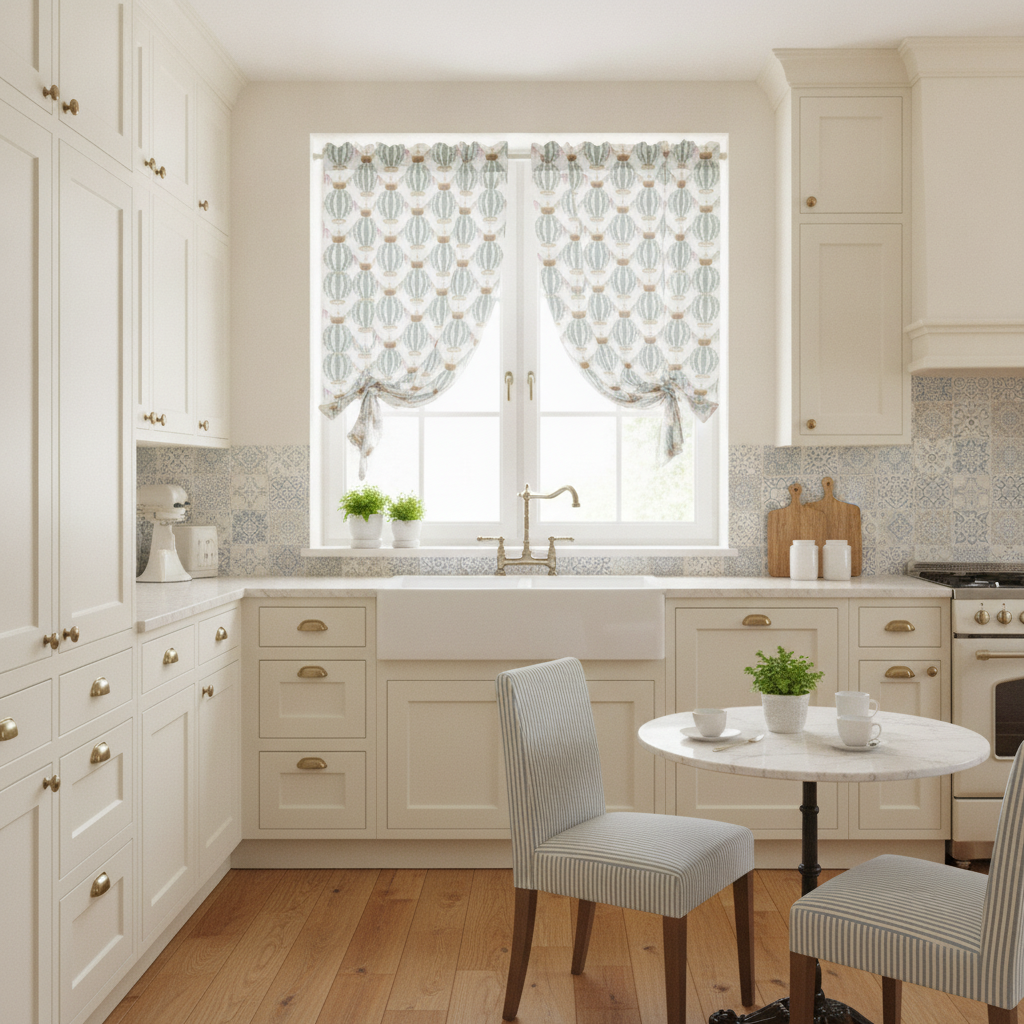
Vintage kitchen with blue striped hot air balloon cafe curtains, creamy off-white walls, and aged brass hardware on cabinets.

A Recipe for Charm: Designing Your Vintage Blue Kitchen

Creating a kitchen that feels both fresh and steeped in history is a satisfying project. For Paper & Frill, we often see customers drawn to the timeless appeal of a vintage aesthetic, particularly when paired with the calming versatility of blue. A vintage blue kitchen is a space that invites lingering conversations and thoughtful meals, providing comfort without sacrificing style. Here’s how to build one with precision and character.

The Foundation: Soft Hues and Thoughtful Details

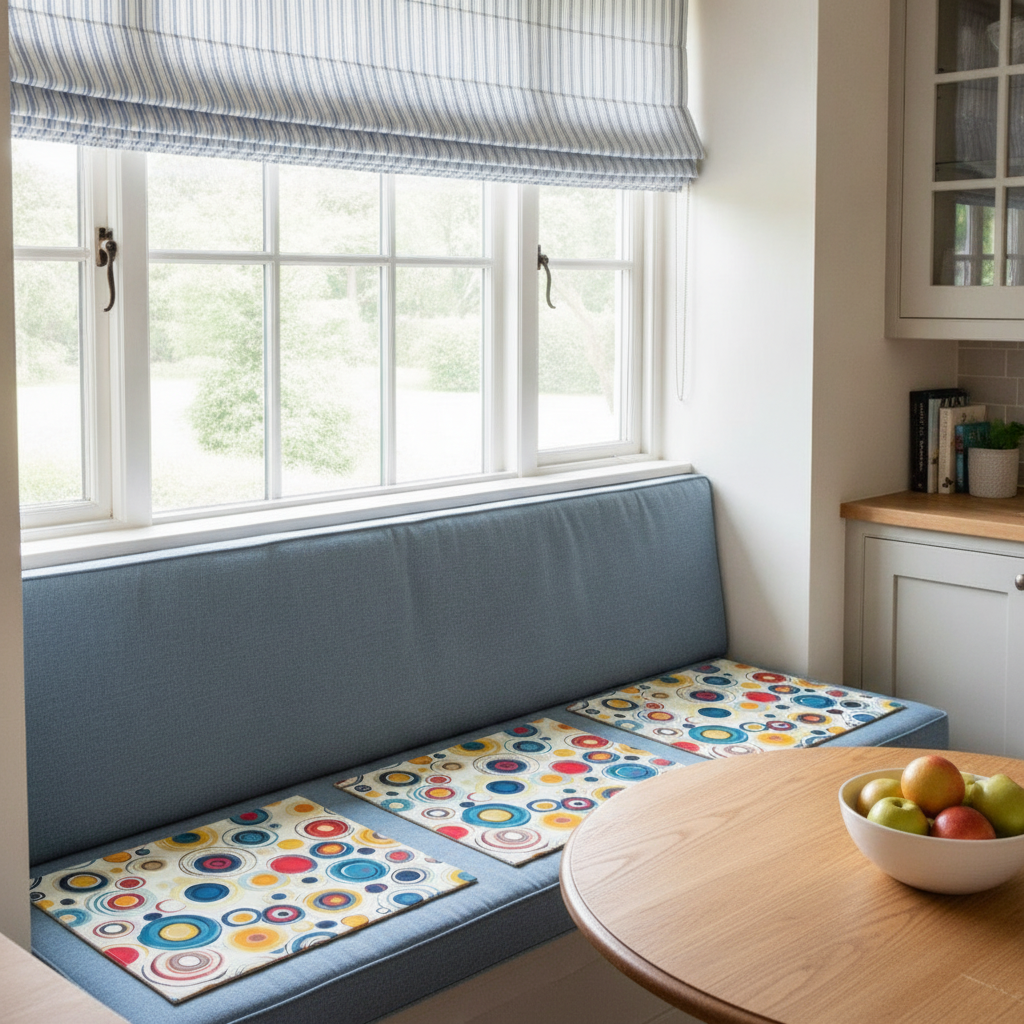
Kitchen banquette upholstered in soft denim blue, with retro blue and yellow circle placemats, and a window featuring a blue ticking stripe roman blind.

Start with a base that allows your blue elements to truly shine. For walls and cabinetry, avoid stark white, which can feel too modern. Instead, opt for a soft, creamy off-white like Benjamin Moore’s "Cloud White" OC-130 or Sherwin-Williams’ "Pure White" SW 7005. These shades offer warmth and a gentle backdrop. When selecting hardware, choose finishes that echo a bygone era: aged brass for a warm, traditional feel, or brushed nickel for a slightly cooler, yet still classic, touch. Door and drawer pulls in a cup pull style or simple knob add to the vintage authenticity.

Introducing Pattern and Texture

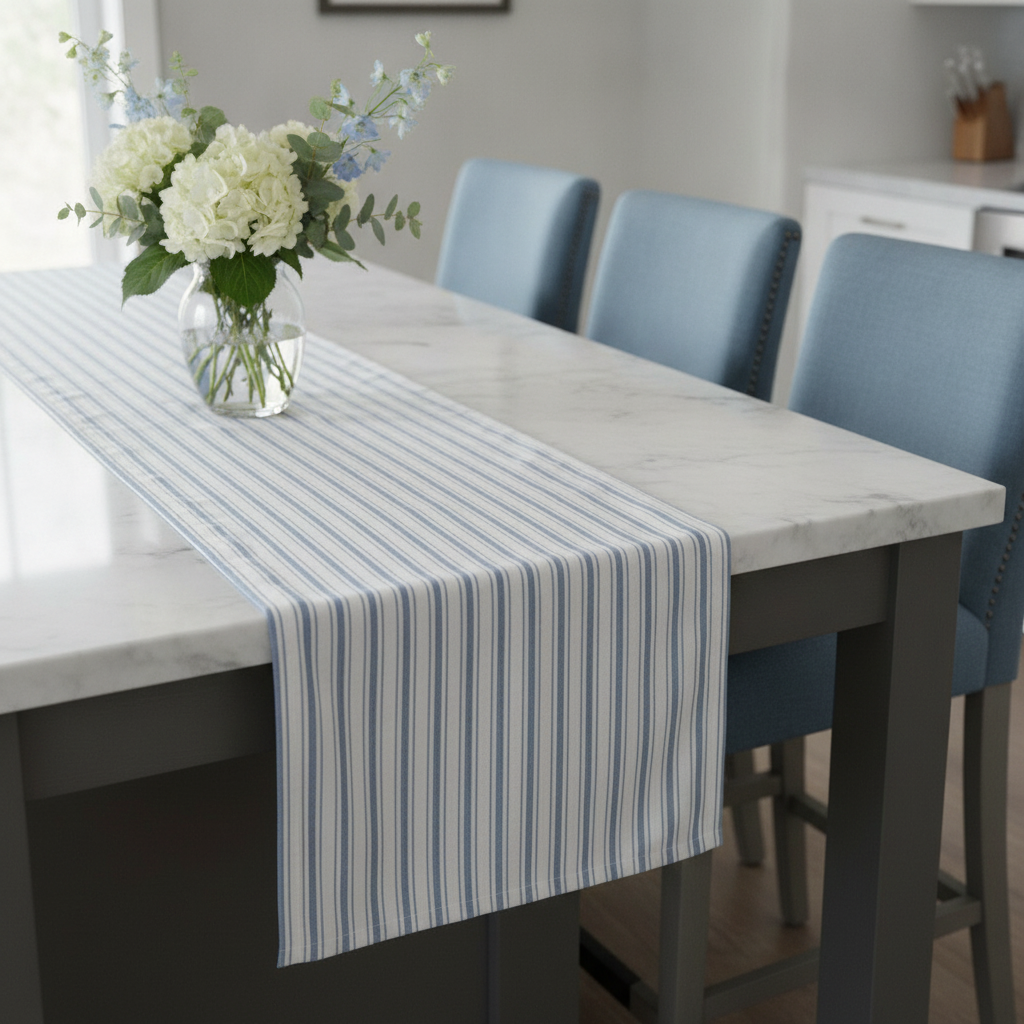
Kitchen island with a blue ticking stripe fabric runner, fresh flowers, and soft denim blue bar stools in the background.

This is where our designs come in, bringing life and personality to your vintage blue kitchen. Thoughtful fabric choices can define the room’s atmosphere.

Window Treatments with Whimsy

Consider window treatments that provide privacy without blocking natural light. For a charming cafe curtain look, the Vintage Ornamental Blue Striped Hot Air Helium Balloons fabric is an excellent choice. This design features nineteenth-century stylized hot air balloons with tear-drop and globe shapes adorned with festoons, flags, sandbags, and banners, all in a distinct blue stripe. For a window 90cm wide, cut your fabric to 160-180cm wide to ensure ample fullness when gathered. Hang the curtain rod approximately halfway up the window, around 60cm from the sill, allowing the pattern to be fully appreciated while still letting light into the top half of the pane.

  • **Primary Use:** Cafe curtains for a kitchen window. For a standard 90cm wide window, you’ll need two panels, each 80-90cm wide and 40-50cm long (plus hem allowances). Hang the rod 60cm from the sill.
  • **Second Use Idea:** This whimsical fabric also makes excellent small decorative cushions for a breakfast nook banquette, or tailored kitchen tea towels for display.

Classic Stripes for Timeless Appeal

For a more tailored look, especially on larger windows or for cabinet inserts, the Traditional Micro Sky Blue Blue Vintage Ticking Upholstery Stripes fabric offers subtle sophistication. This fabric features micro sky blue and white mattress narrow ticking bed stripes in a vintage style, with narrow and thinner stripes alternating. It’s perfect for Roman blinds, providing clean lines that complement the vintage aesthetic.

  • **Primary Use:** Roman blinds for kitchen windows. For a window measuring 120cm wide by 100cm high, you’ll need fabric cut to approximately 125cm wide and 120cm long (allowing for hems and rod pocket casings). Ensure the finished blind drops to 2cm above the windowsill.
  • **Second Use Idea:** This durable ticking stripe is ideal for simple, padded chair seats at a kitchen table, or for creating a traditional table runner that can extend over the edges of a 1.8m island by 15-30cm on each side, meaning a runner length of 2.1-2.4m and a width of 60-75cm.

Adding a Pop of Retro Character

Even in a vintage kitchen, a touch of playful modernism can prevent the space from feeling staid. The Retro Abstract Circles with Blue and Yellow on Light Background fabric introduces a bold abstract design featuring vibrant blue and yellow concentric circles set against a light background. This design, while retro, uses colors that blend seamlessly with a vintage blue palette.

  • **Primary Use:** This vibrant fabric is excellent for creating a set of playful placemats or a custom notice board cover. For placemats, aim for a finished size of 35x45cm.
  • **Second Use Idea:** Consider using this fabric as a backing for the interior of open shelving units, cut to fit the exact dimensions of each shelf back. It can also be used to line drawers or pantry shelves, adding an unexpected burst of color and pattern.

Comfort with Soft Blue Solids

To ground the patterns and introduce softness, incorporate a solid blue. The Illinois Soft Denim Blue Midwestern Ease fabric is a soft denim blue inspired by Illinois skies, lakes, and a relaxed style. Its calm and casual tone makes it versatile.

  • **Primary Use:** This fabric is ideal for upholstery on a kitchen banquette or for recovering bar stool seats, providing comfort and a solid block of color. For a typical 1.5m banquette, you’d need approximately 3-4 meters of fabric, depending on cushion thickness and design.
  • **Second Use Idea:** This soft denim blue is perfect for creating tailored kitchen towels with a minimalist feel, or for a simple valance above a sink window, cut to 30-45cm in depth.

DIY Project: Simple Fabric Placemats

Adding custom placemats is an easy way to introduce pattern and protect your table. Here’s how to make four simple reversible placemats using your chosen fabrics, such as the Retro Abstract Circles with Blue and Yellow on Light Background and the Illinois Soft Denim Blue Midwestern Ease.

  1. **Gather Materials:** You will need approximately 1 meter of each chosen fabric (to make four 35x45cm placemats with some allowance), coordinating thread, a sewing machine, scissors or a rotary cutter, a ruler, and an iron.
  2. **Cut Fabric:** For each placemat, cut two pieces of fabric measuring 38cm x 48cm. This allows for a 1.5cm seam allowance on all sides for a finished size of 35x45cm.
  3. **Pin and Stitch:** Place one patterned fabric piece and one solid fabric piece right sides together. Pin along all four edges. Stitch around the perimeter with a 1.5cm seam allowance, leaving a 10cm opening on one long side for turning. Backstitch at the beginning and end of your stitching.
  4. **Trim Corners:** Clip the corners diagonally, being careful not to cut through your stitching. This reduces bulk.
  5. **Turn and Press:** Turn the placemat right side out through the opening. Use a blunt object, like a chopstick, to gently push out the corners. Press the entire placemat flat with an iron, ensuring the raw edges of the opening are neatly tucked in.
  6. **Topstitch:** Topstitch around all four edges of the placemat, about 0.5cm from the edge. This closes the opening and gives the placemat a crisp, finished look. Repeat for all four placemats.

What to Avoid

To maintain the integrity of your vintage blue kitchen, steer clear of a few common pitfalls:

  • **Over-matching Blues:** While blue is your theme, using the exact same shade across every element (walls, cabinets, fabrics) can make the room feel flat and monolithic. Vary your blues with different tones – from sky blue to denim to deeper navy – for depth.
  • **Shiny New Hardware:** Polished chrome or highly polished brass can instantly detract from a vintage feel. Opt for aged, brushed, or oil-rubbed finishes instead.
  • **Clinical Lighting:** Harsh, cool-toned LED lighting can erase warmth. Choose lighting with a warmer color temperature (around 2700-3000K) and fixtures that complement your vintage style, such as milk glass pendants or industrial-inspired sconces.
  • **Cluttered Countertops:** A vintage kitchen thrives on a sense of order and curated displays. Avoid leaving too many modern appliances or excessive clutter out. Store what you don’t use daily and display only items that enhance the vintage aesthetic, such as ceramic crocks or antique-style canisters.

Embrace Timeless Charm: Crafting Your Dream Vintage White Kitchen

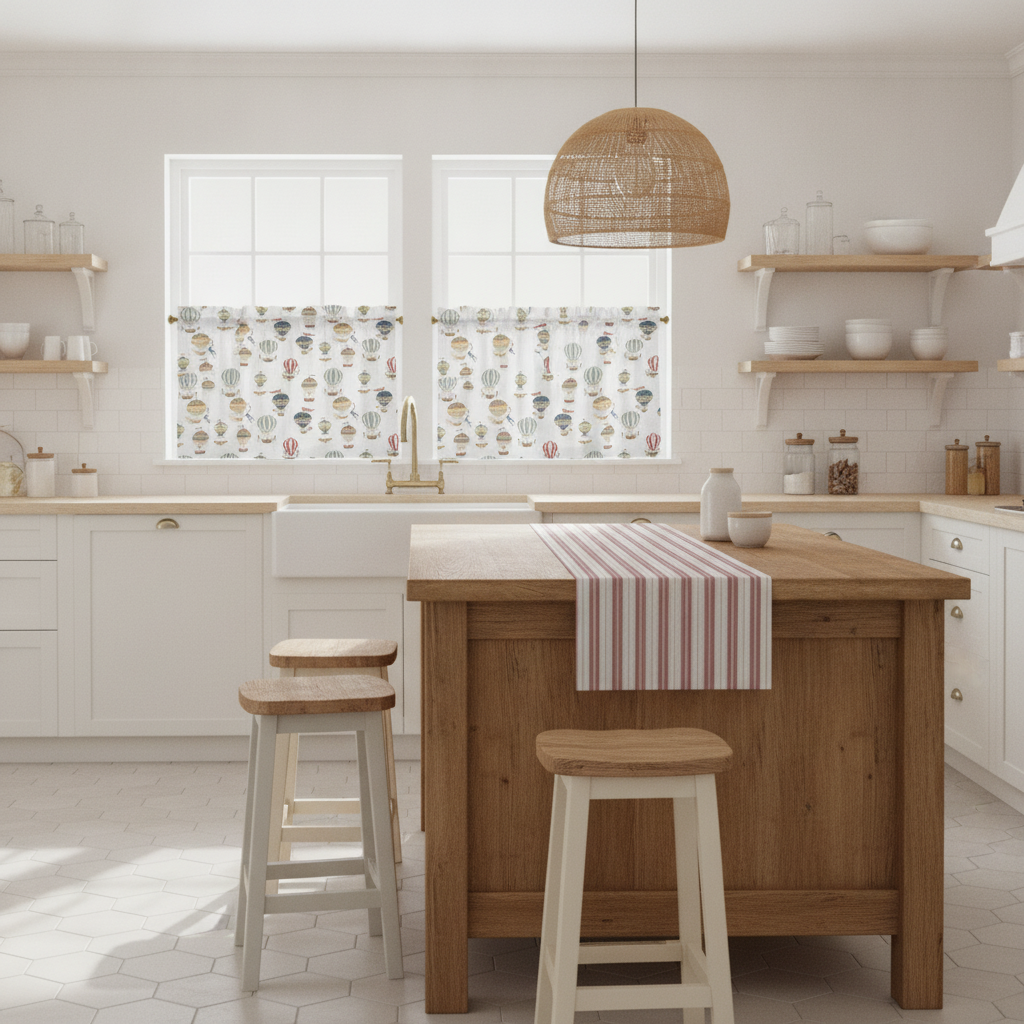
A charming vintage white kitchen featuring light blue and white patterned hot air balloon café curtains, a white wooden island with a red and white ticking stripe runner, and a white subway tile backsplash.

Embrace Timeless Charm: Crafting Your Dream Vintage White Kitchen

There’s something undeniably captivating about a vintage white kitchen. It’s a space that whispers tales of bygone eras, yet feels utterly fresh and relevant today. At Paper & Frill, we adore how this classic combination offers a blank canvas, allowing subtle patterns and textures to truly sing. A vintage white kitchen isn’t just a trend; it’s a timeless choice, offering a bright, airy, and incredibly versatile foundation for your culinary sanctuary.

White instantly brightens any room, making even the smallest kitchens feel more expansive and inviting. When paired with vintage elements – think traditional cabinetry, classic fixtures, and thoughtful soft furnishings – it creates an atmosphere that is both serene and full of character. The beauty lies in the details, and with our diverse range of surface patterns, you can infuse your kitchen with that coveted vintage charm without overwhelming its crisp, clean aesthetic.

Key Elements for Your Vintage White Kitchen

Transforming your kitchen into a vintage white haven is all about layering textures and introducing patterns in unexpected ways. Here’s how you can weave in designs to create a space that feels authentically vintage and beautifully white.

Soft Furnishings with Personality

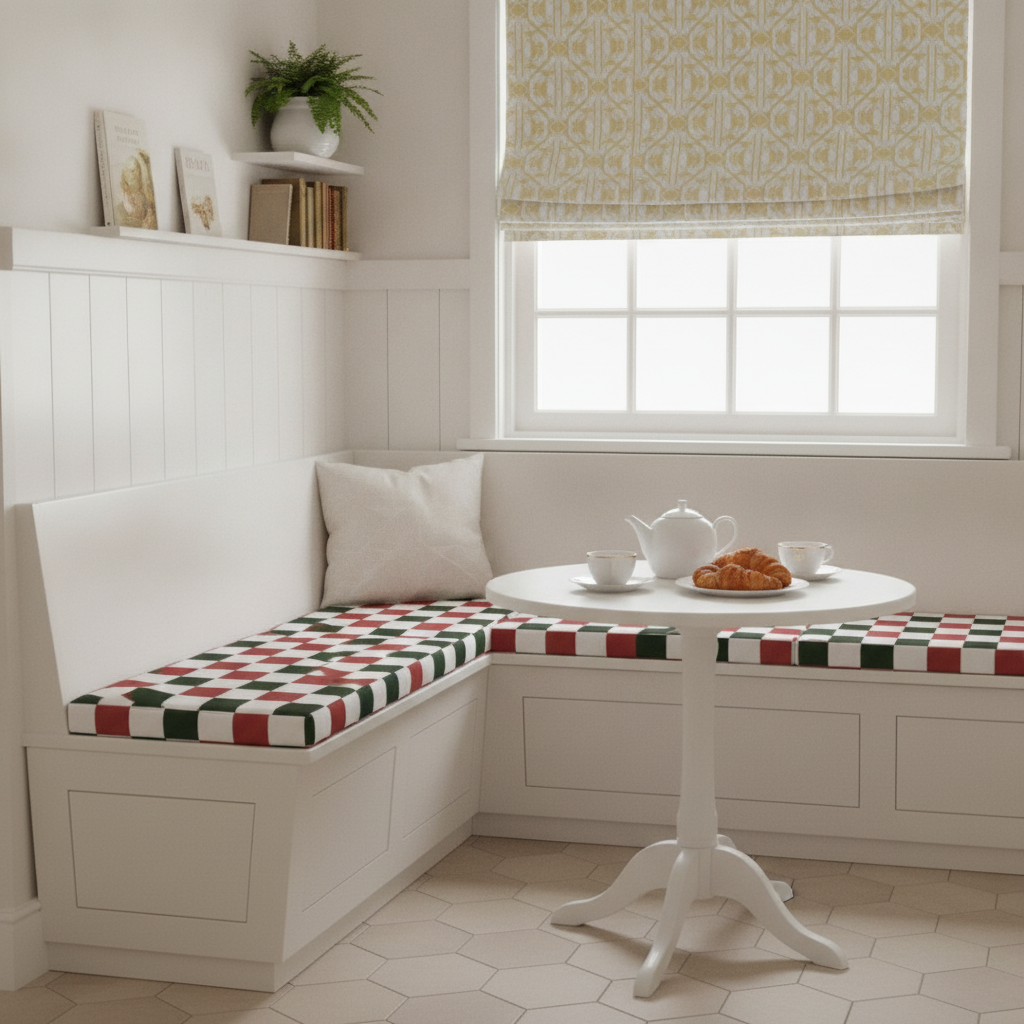
A bright vintage white kitchen breakfast nook with built-in bench seating, upholstered in a cranberry and green checkered fabric, and a window above with a white and gold geometric patterned Roman blind.

Curtains, blinds, and cushions are your allies in adding warmth and pattern. They break up the expanses of white without detracting from the overall brightness.

  • For a touch of whimsical elegance, consider the Vintage Hot Air Balloons on White fabric. Its delicate design on a pristine white background is perfect for creating charming café curtains that filter natural light beautifully. Imagine these adorning a small window above your sink, or even tailored into seat pads for a quaint breakfast nook. The subtle, vintage-inspired palette of the balloons adds interest without competing with your white aesthetic.
  • To introduce a classic, sophisticated stripe, our Wine Red and White Vintage Provincial French Chateau Ticking Stripe fabric is an exquisite choice. Ticking stripes are a cornerstone of vintage design, and this particular pattern, with its rich wine red accent, brings a provincial French farmhouse feel. Use it for full-length curtains to frame a large kitchen window, or perhaps for a custom Roman blind. It also works beautifully as a tailored tablecloth for a kitchen island or a runner for open shelving, adding a refined touch of colour and texture.

Adding Subtle Character

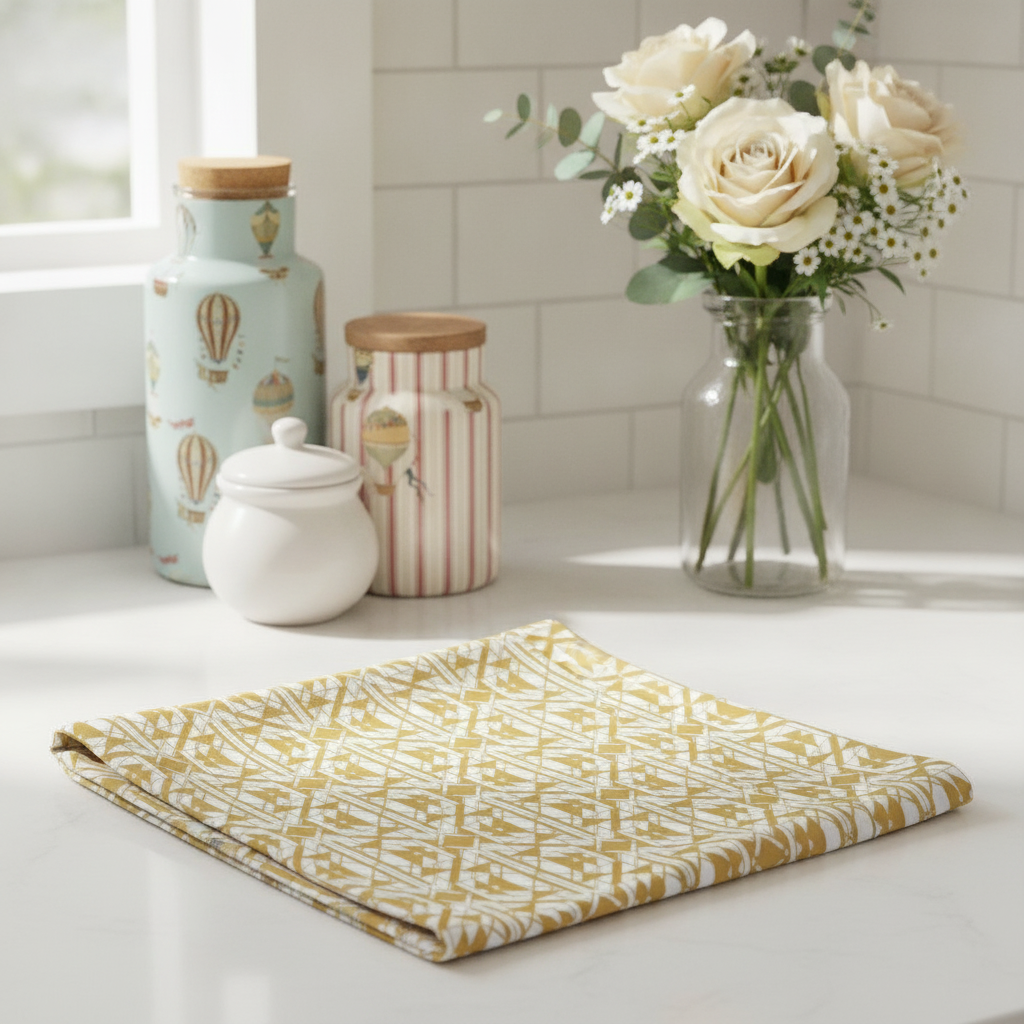
A close-up of a white kitchen counter with a folded white and gold geometric patterned tea towel, vintage white ceramic jars, and a glass vase with fresh white flowers.

Beyond the larger fabric applications, smaller details can make a significant impact, layering character into your vintage white kitchen.

For a dash of old-world glamour, the White and Gold Faux Foil Vintage Art Deco Geometric Triangle Pattern fabric offers a unique touch. While Art Deco might typically evoke a more opulent feel, in a white kitchen, this pattern can be used sparingly to introduce sophistication. Imagine it as a decorative blind for a pantry door window, or even cut and framed as a series of small art pieces to adorn a white wall. The subtle gold “faux foil” shimmer catches the light beautifully, adding a quiet luxury that elevates the space without overwhelming its vintage simplicity.

Cosy, Rustic Touches

Even in a bright white kitchen, elements of warmth and rusticity are essential for that welcoming vintage feel. This is where a classic check can truly shine.

Embrace traditional charm with our 4 inch Vintage Cranberry and Green Christmas Checkered Pattern fabric. While the name might hint at festive cheer, this timeless checkered design, with its warm cranberry and deep green, is wonderfully versatile for year-round vintage appeal. The generous 4-inch check makes a visual statement without being too busy. Think of it for plush seat cushions on traditional kitchen chairs, or as a long, inviting runner down the centre of a farmhouse table or kitchen island. It instantly injects a cosy, rustic warmth that perfectly complements the crisp white backdrop, creating an inviting and comfortable atmosphere.

The Perfect Canvas for Your Culinary Creativity

A vintage white kitchen is a celebration of enduring style, where every detail contributes to a sense of history and charm. By carefully selecting patterns like those from Paper & Frill, you can craft a space that is not only beautiful and functional but also uniquely yours. The beauty of white is its ability to highlight these thoughtful choices, ensuring your kitchen remains a bright, welcoming heart of the home for years to come. Let your imagination soar and create a vintage white kitchen that truly feels like home.